
This section describes how to create and configure Test Suites for testing mobile applications on a single device.
You can use either an Autonomous Test Suite or a Scenario Test Suite depending on your testing needs.
For example, you can verify login or payment features, or perform stability testing to detect unexpected app errors.
Autonomous Test Suite #
An Autonomous Test Suite allows AI to automatically explore the app without predefined scenarios.
A default Autonomous Test Suite is created during project setup, and you can add more if required.
Creating an Autonomous Test Suite #
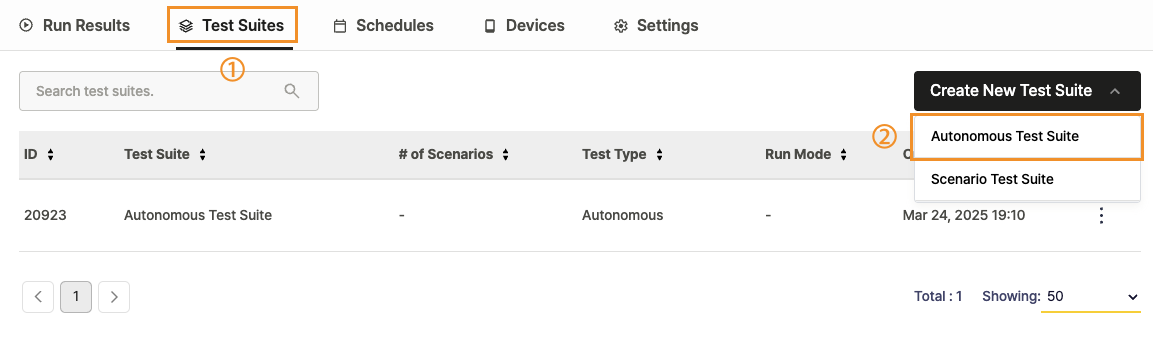
- Go to the Test Suites tab in your project.
- Click Create New Test Suite and select Autonomous Test Suite.
A new Autonomous Test Suite is created and displayed in the list.
Setting up an Autonomous Test Suite #
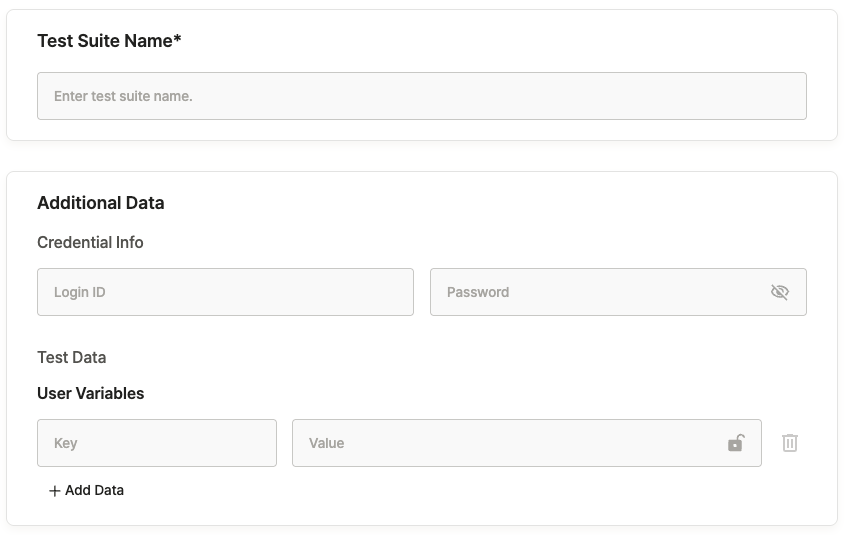
- Test Suite Name: Enter a name for the Test Suite.
- Additional Data: Set up login credentials and user variables for autonomous testing.
Credential Info
- Use Credential Info to define login credentials automatically applied when login pages are detected during testing.
- Login ID: Account ID used for login during testing
- Password: Password for the test account
The credentials are automatically entered whenever a login page appears.
To learn more, see [Additional Usage Guide > 2.0. Working with Input Data].
User Variables
Define User Variables to store reusable key-value data pairs for autonomous testing.
| Field | Description |
|---|---|
| Key | Variable name. |
| Value | Variable value. |
You can verify the application of Credential Info and User Variables in the test results.
To learn more, see [Additional Usage Guide > 2.0. Working with Input Data].
You can verify the application of Credential Info and User Variables in the test results.
To learn more, see [Additional Usage Guide > 3.0. Using Ptero Test Results].
Scenario Test Suite #
A Scenario Test Suite runs scenarios created in Stego to verify specific app flows and features.
Use this type to test functional areas such as onboarding, checkout, or multi-step user journeys.
Creating a Scenario Test Suite #
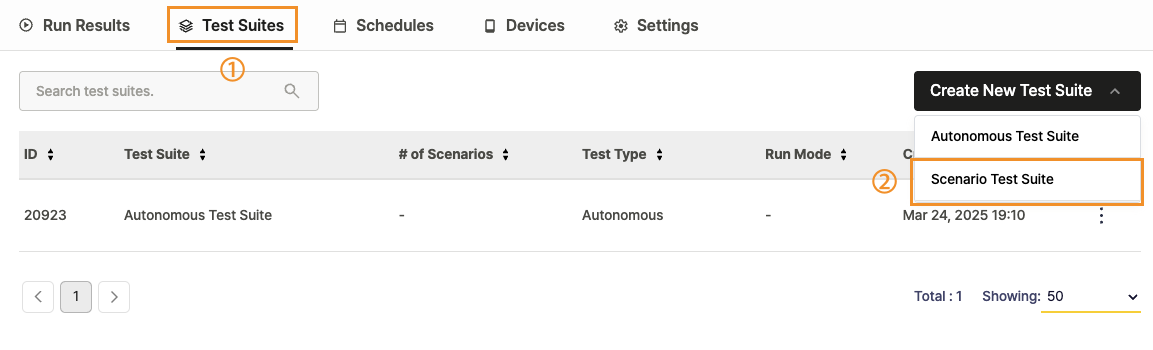
- Go to the Test Suites tab in your project.
- Click Create New Test Suite and select Scenario Test Suite.
A new Scenario Test Suite is created and listed in the project.
Scenario Test Suite Configuration #
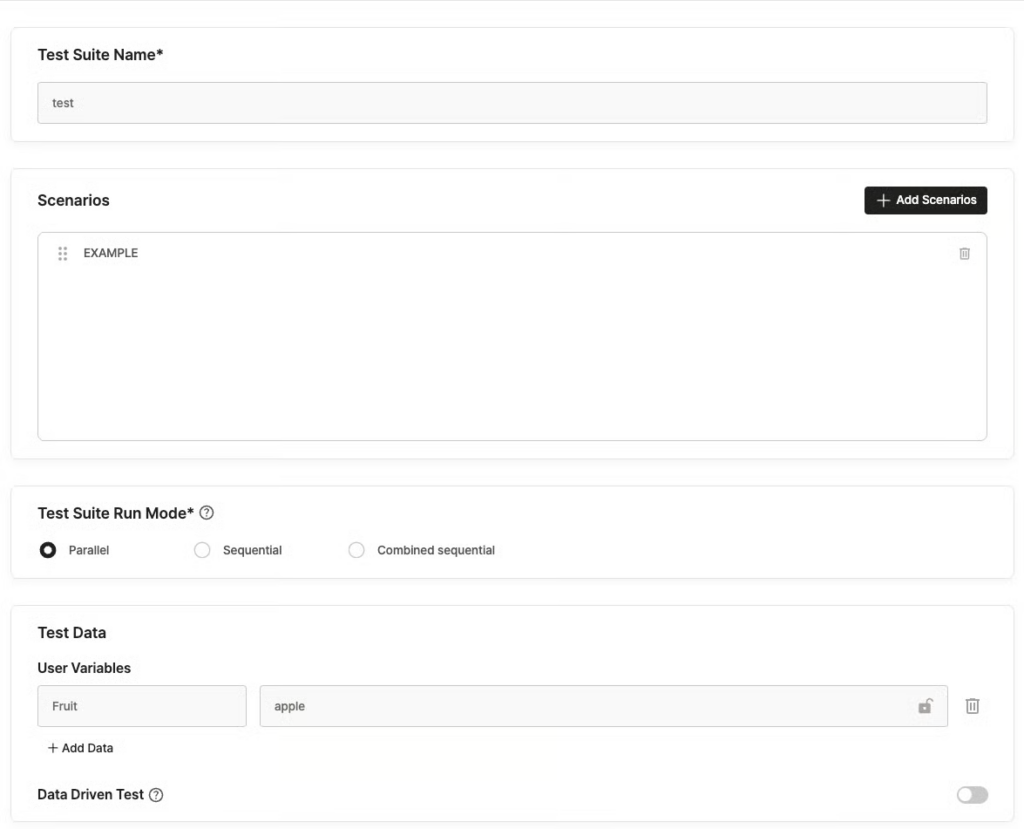
1. Test Suite Name: Enter a name for the Test Suite.
2. Scenarios:
- Click + Add Scenarios to select scenarios from the Scenario Repository.
- Group scenarios by feature or purpose to organize your testing efficiently.
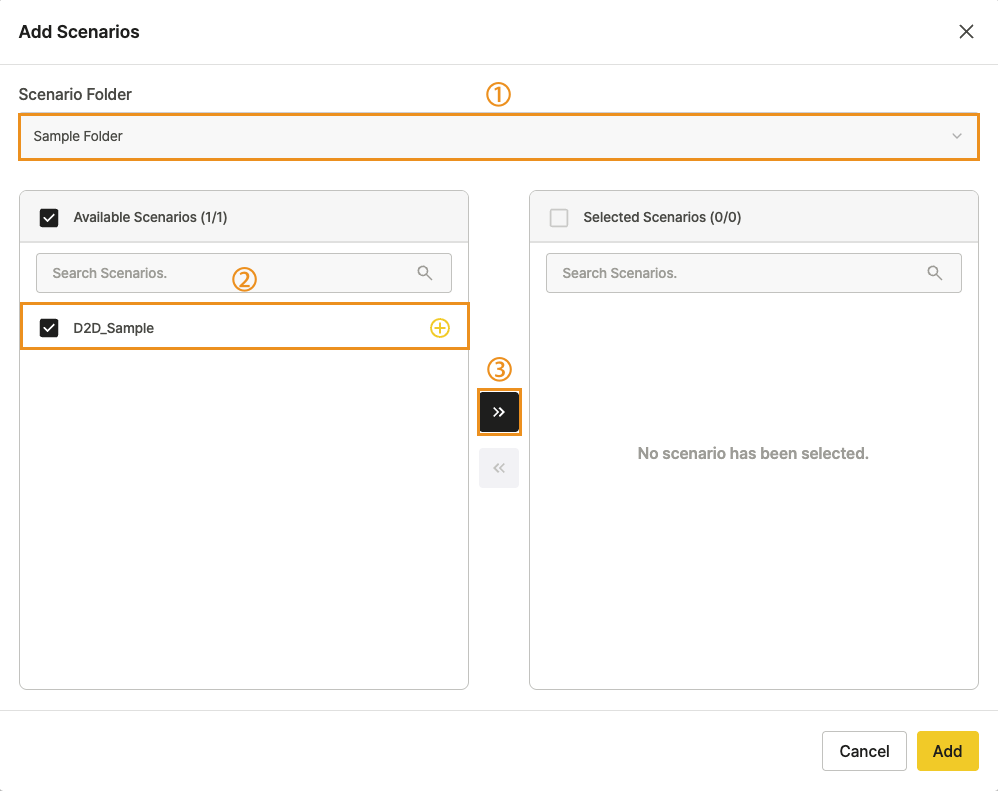
In the Add Scenarios popup:
- Select the folder containing your scenarios.
- Choose the scenarios to add.
- Click Add to save.
To learn more, see [Ptero User Guide › 9.0. Scenario Repository Management].
3. Test Suite Run Mode: Select how scenarios will run.

| Mode | Description |
|---|---|
| Parallel | Runs scenarios independently to reduce total test time. Use when tests do not share data or state. |
| Sequential | Runs scenarios in order. Use when sequence or shared login accounts are required. |
| Combined Sequential | Merges scenarios into a single flow and saves results as one test result. |
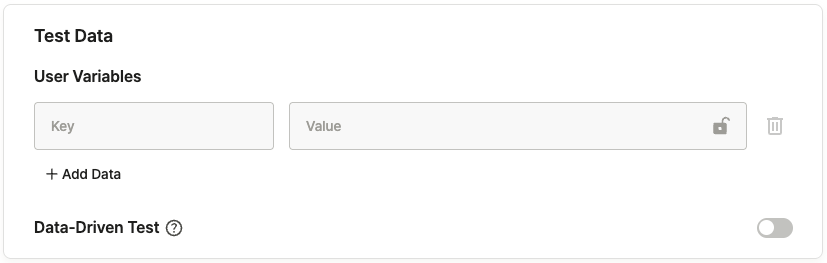
4. Test Data: Configure data required for scenario execution.
User Variables: Define reusable key-value pairs for your tests.
| Field | Description |
|---|---|
| Key | Variable name. |
| Value | Variable value. |
To learn more, see [Additional Usage Guide > 2.0. Working with Input Data].
Data Set
Upload a CSV file to manage large sets of User Variables efficiently.

After upload, preview the file contents to confirm values.
To learn more, see [Additional Usage Guide > 2.0. Working with Input Data].
You can verify the application of User Variables and Data Sets in the test results.
To learn more, see [Additional Usage Guide > 3.0. Using Ptero Test Results].