
This section explains how to configure the UIObject field to improve scenario accuracy and stability.
UIObject Field Modal Overview #

Click the step’s UIObject field to open the UIObject Field modal.
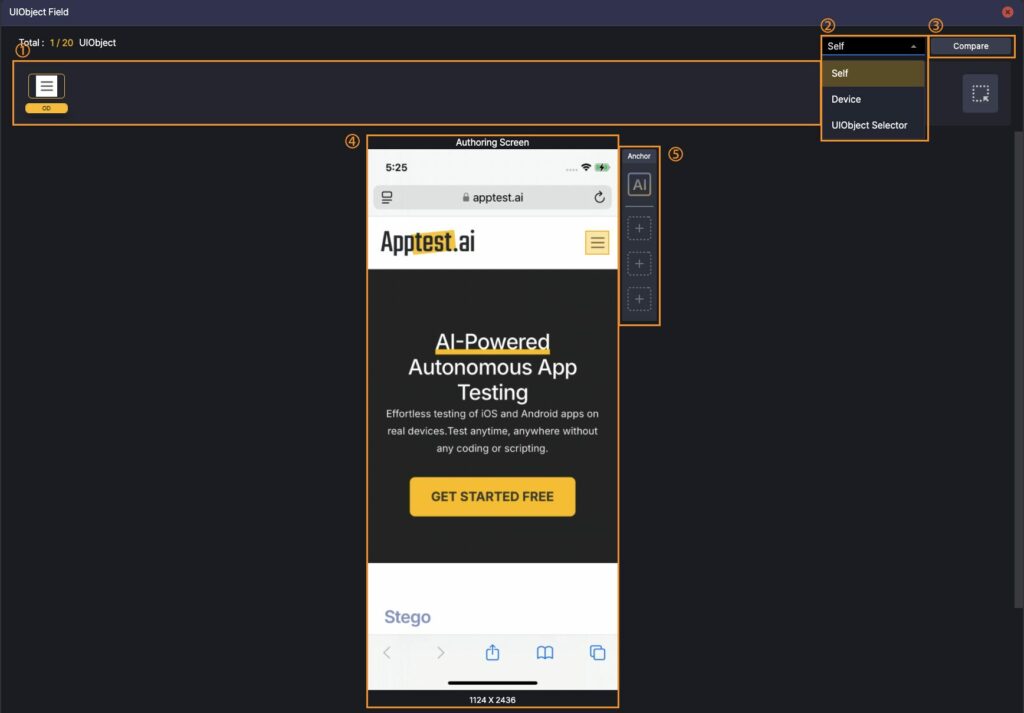

① UIObject Field
Stores up to 20 UIObjects per step. Drag a UIObject to duplicate. Drag from the UIObject Selector to add.
② Comparison Source
Choose the screen used for matching:
- Self: the current Authoring Screen
- Device: your connected device screen
- UIObject Selector: a screen from analysis or an image URL
③ Click Compare to preview matches against the screen chosen in ②.
④ Authoring Screen
Displays the captured screen to review and verify UIObjects.
⑤ Anchors
Add up to 3 Anchors to locate the target by relative position. Click AI to re-analyze the screen.
⑥ Attributes
Adjust per-UIObject properties (e.g., Label, Text, Text Similarity, Case Sensitivity, Selector) to fine-tune matching.
UIObject Matching #
You can use three methods to improve UIObject matching.
Add Different UIObject Types #
Add different types of UIObjects to the UIObject Field.

Click the step’s UIObject field to open the UIObject Field modal.
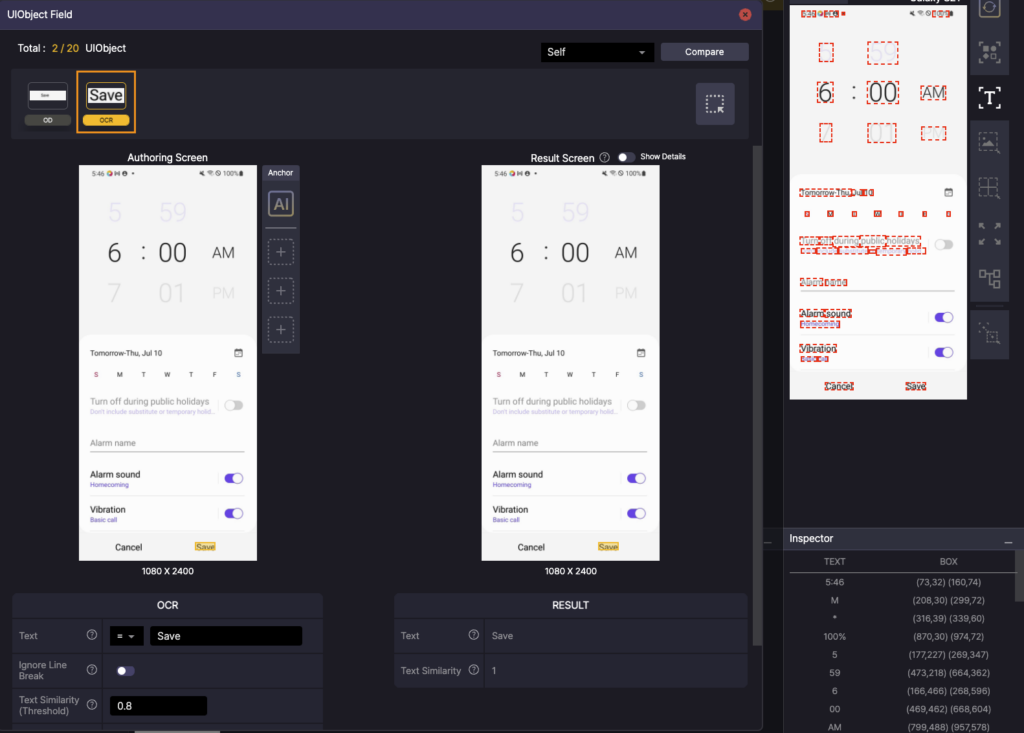
On the device screen, drag the Save text into the UIObject field to add an OCR UIObject.
Note
If multiple UIObjects are provided, the step uses the highest-scoring match.
Change UIObject Properties #
Adjust Text Similarity #
In OCR settings, set Text Similarity = 1 to match only the exact text.
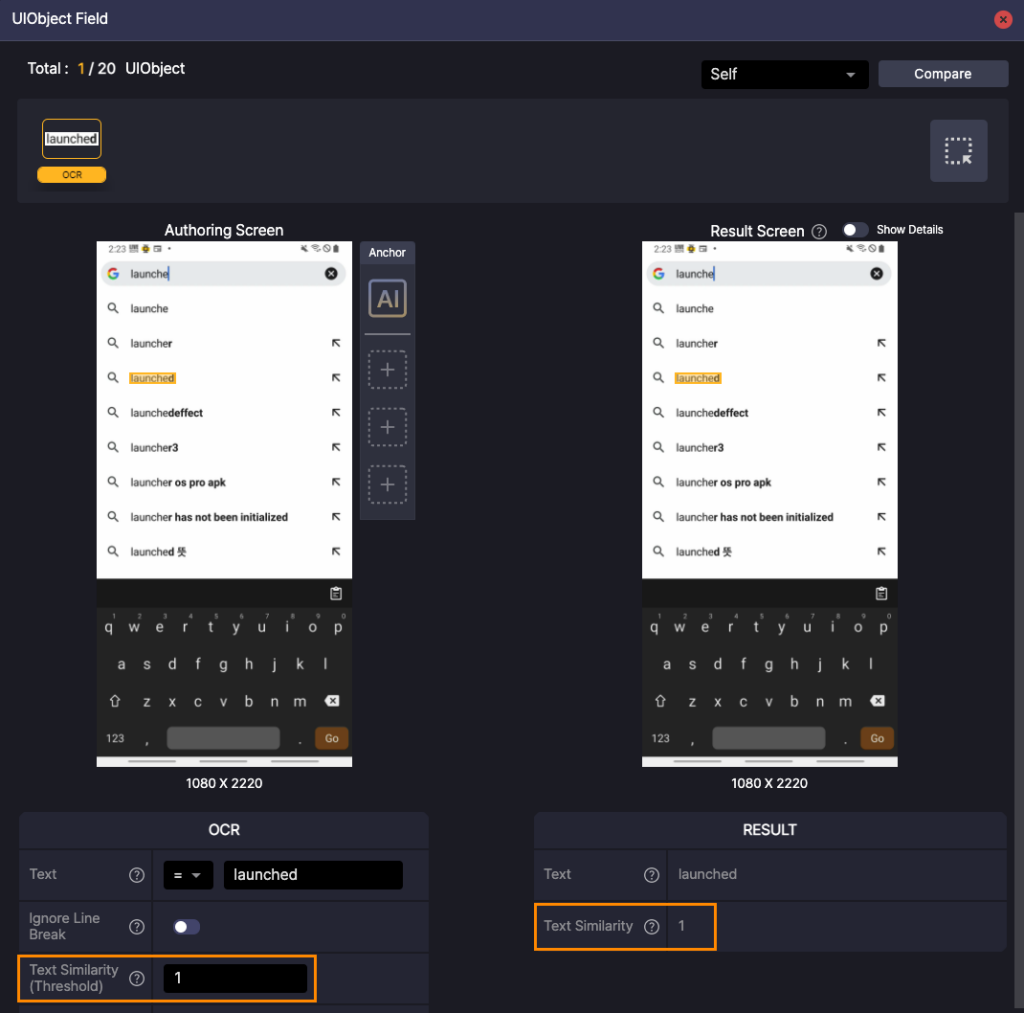
Example:
Searching for “launched” might also match “launche”. Set Text Similarity = 1 to restrict matches to “launched” only.
To learn more about UIObject properties, see [Stego User Guide > 7.2. UIObject Settings].
Find UIObjects by Order #

When multiple UIObjects share the same properties, use Attributes › Selector to target a specific one.
- Positive values select from the top (e.g., Selector = 5 selects the 5th occurrence from the top).
- Negative values select from the bottom (e.g., Selector = -3 selects the 3rd from the bottom).
Click Compare to preview which element will be matched.
Note
Within the same row, matches are evaluated left to right (reading order).
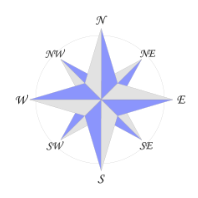
Use Anchors #
Add Anchor UIObjects as reference points so Stego can locate the target relative to them in one of 8 directions (N, NE, E, SE, S, SW, W, NW).
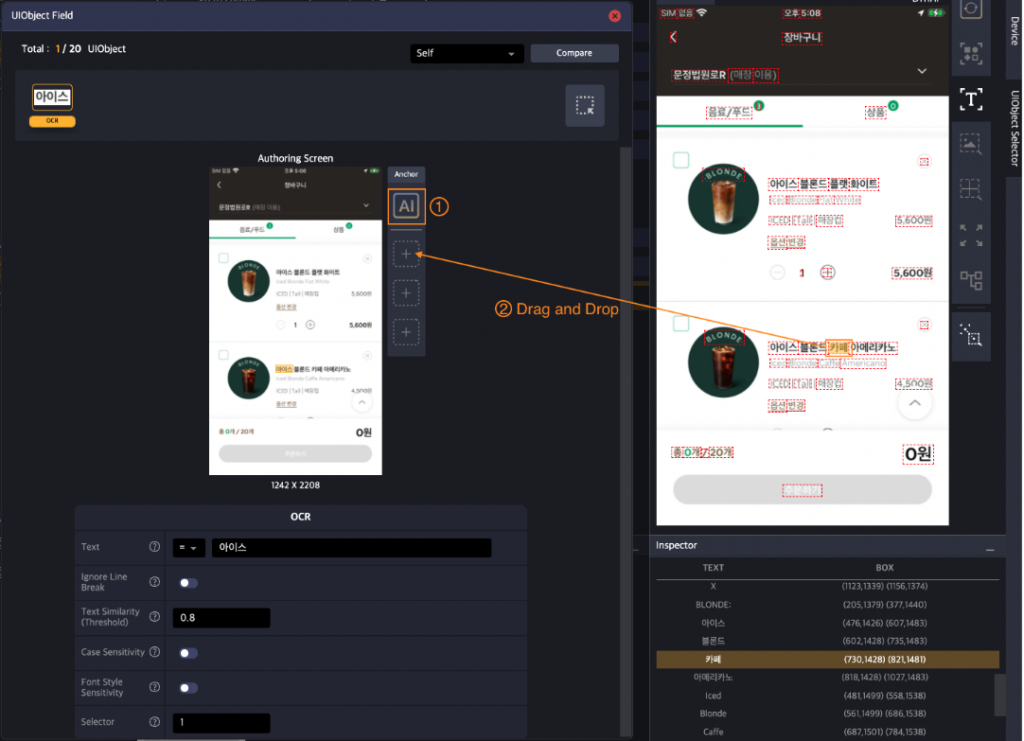
- Click AI on the right side of the Authoring Screen to load or re-analyze the screen.
- Select a UIObject on the screen and drag it to the + area in Anchors to add it.
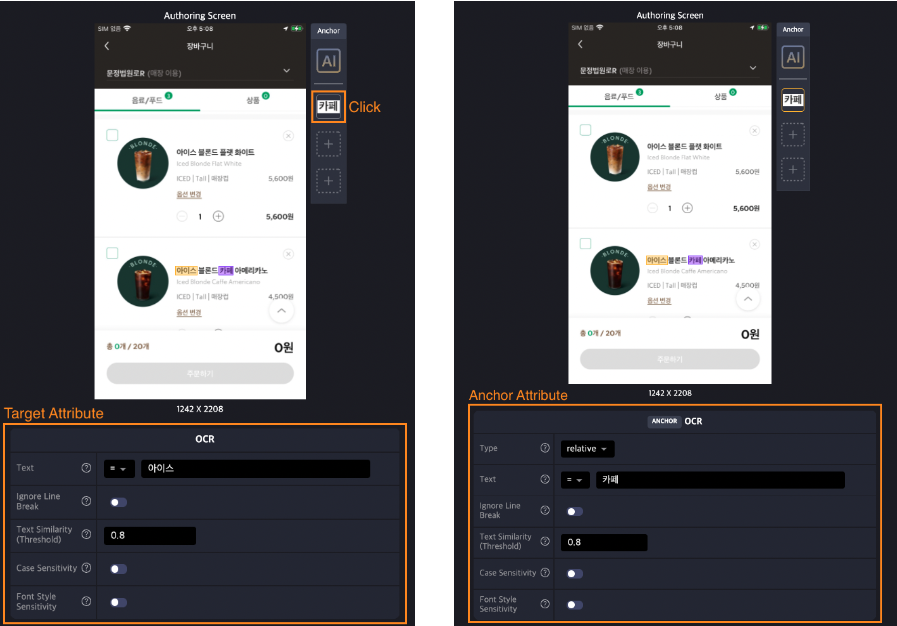
Anchors appear purple. Click an Anchor to edit or delete it.
Note
- You can add up to three Anchors per UIObject.
- During test runs, all Anchors must be detected on screen for the step to run.
- Use Anchors near the target for better stability; avoid dynamic elements (e.g., rotating banners).