
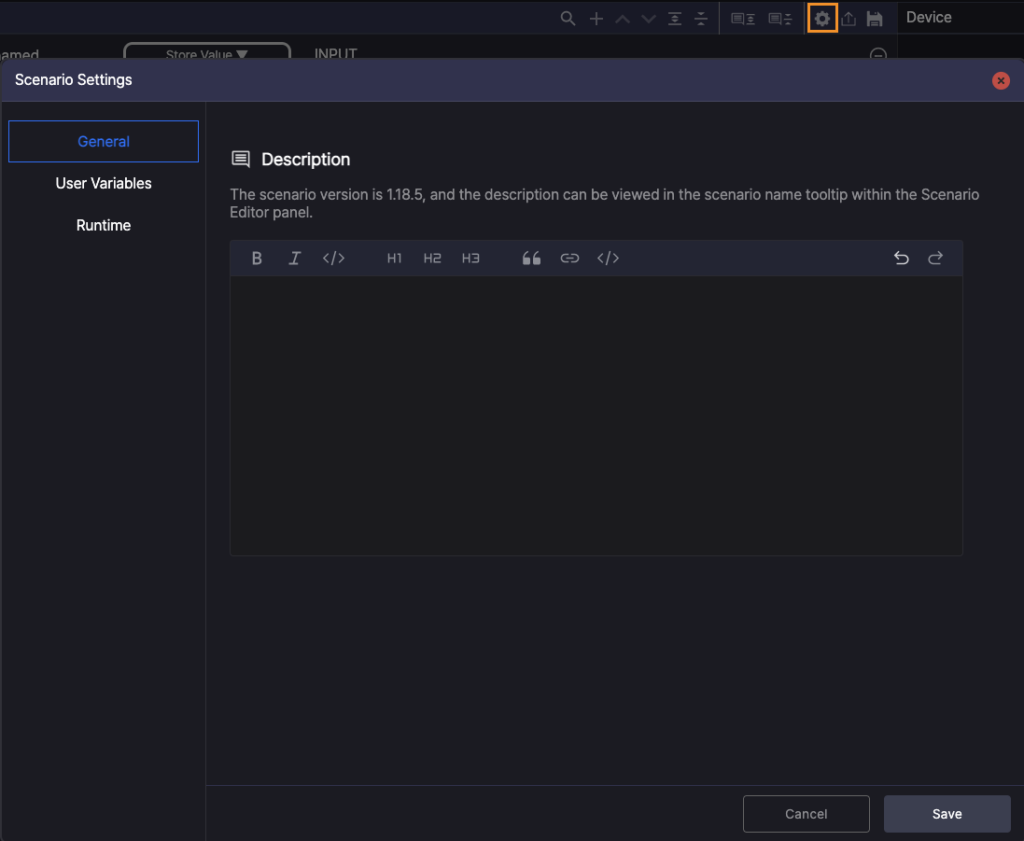
What is Scenario Settings? #
Scenario Settings provide configuration options that control how test scenarios are executed.
The available tabs — General and User Variables — allow users to customize the scenario’s execution flow and runtime behavior in detail.
These settings directly affect how each scenario runs during test execution.
- General: Allows users to enter version information and a description of the scenario.
- User Variables: Enables users to define and store values that are reused throughout the scenario.
Click the gear icon  in the toolbar of the Scenario Editor to open the Scenario Settings window.
General #
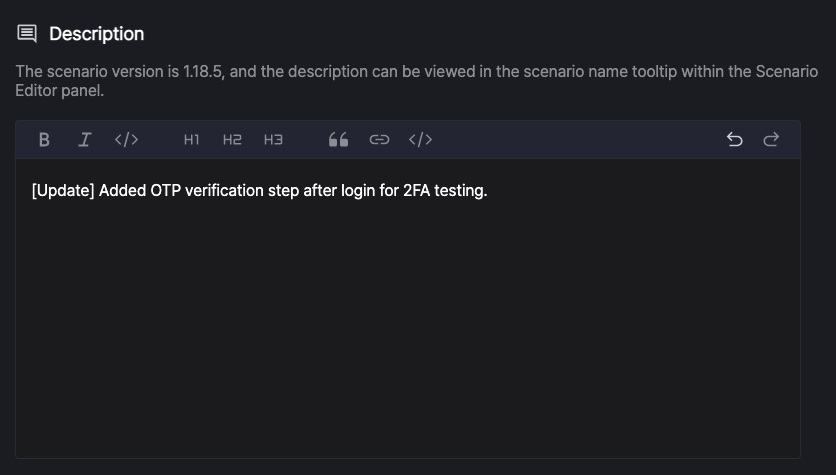
The General tab allows you to view the version of the scenario and add a brief description.
Any description you provide will appear at the top of the Scenario Editor.
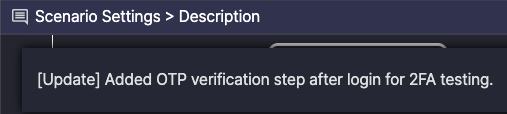
When you hover over the scenario name, the description is displayed as a tooltip.
This feature is useful for identifying the scenario at a glance or sharing additional context with team members.
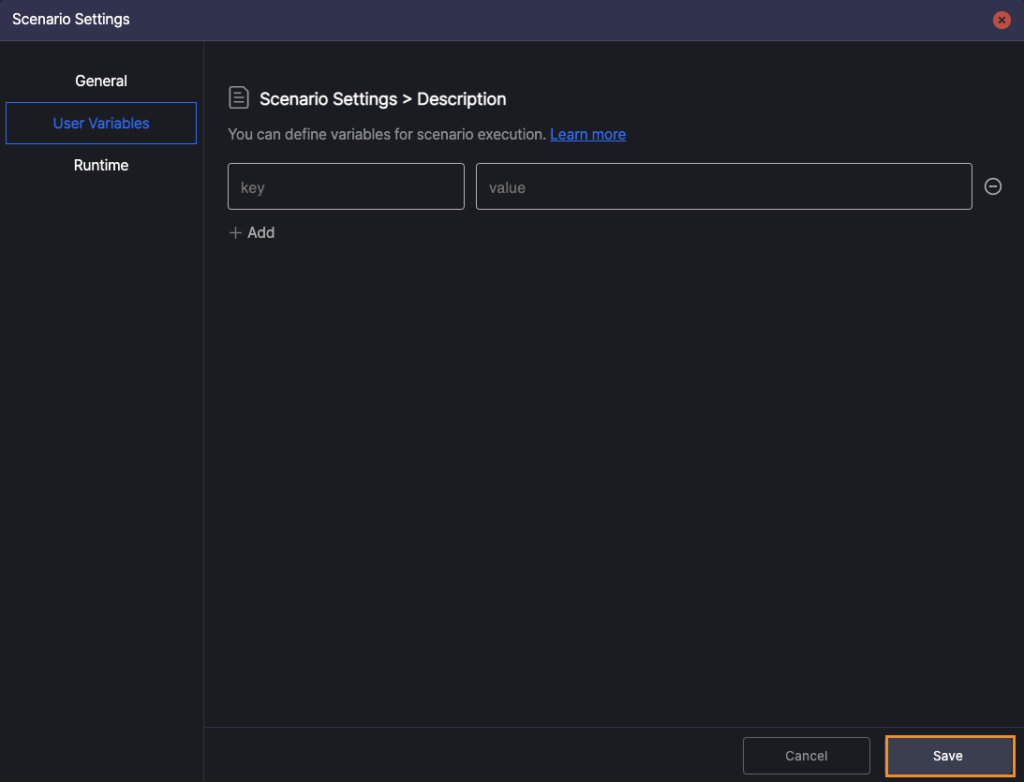
User Variables #
User Variables allow you to define values that can be reused across multiple steps within a scenario.
For example, you can define variables for commonly used data such as a username or phone number, and refer to them throughout the scenario.
Adding User Variables #
To add a User Variable:
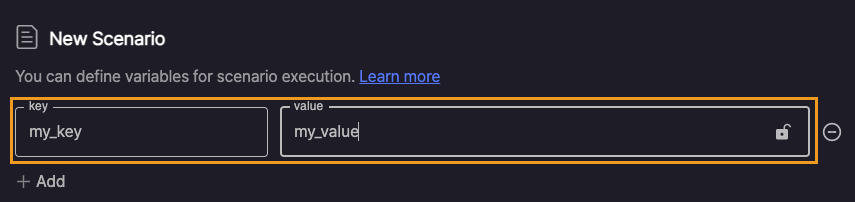
1. Click the + Add button in the Scenario Settings window.
2. Enter a Key and optionally a Value.
3. Click Save to apply the new variable.

Notes When Adding User Variables #
- The Value field can be left blank.
- You can save a User Variable without a value and add or update the value later as needed.
- The Key must be unique and cannot contain spaces.
- Keys that include whitespace characters (such as spaces or tabs), or duplicate an existing key, will not be saved.
- Keys are case-sensitive.
- For example,
userNameandUserNameare recognized as two distinct variables.
- For example,
Editing and Deleting User Variables #
User Variables appear as editable input fields.
To update a User Variable, modify the Key or Value and click Save to apply the changes.
To delete a variable, click the delete icon  next to the variable.
The variable will be removed from the list immediately.
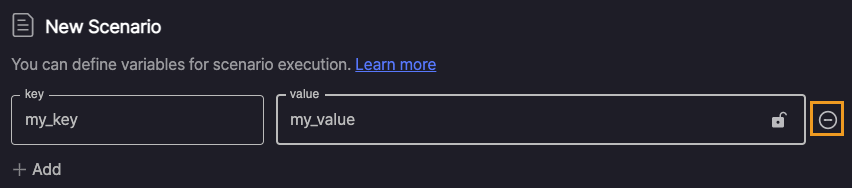
Important: After editing or deleting a User Variable, you must click Save to apply the changes.
Encrypting User Variables #
For sensitive information such as passwords, you can encrypt the Value by clicking the lock icon  next to the field.
Once encrypted, the Value will be masked and not displayed in plain text.
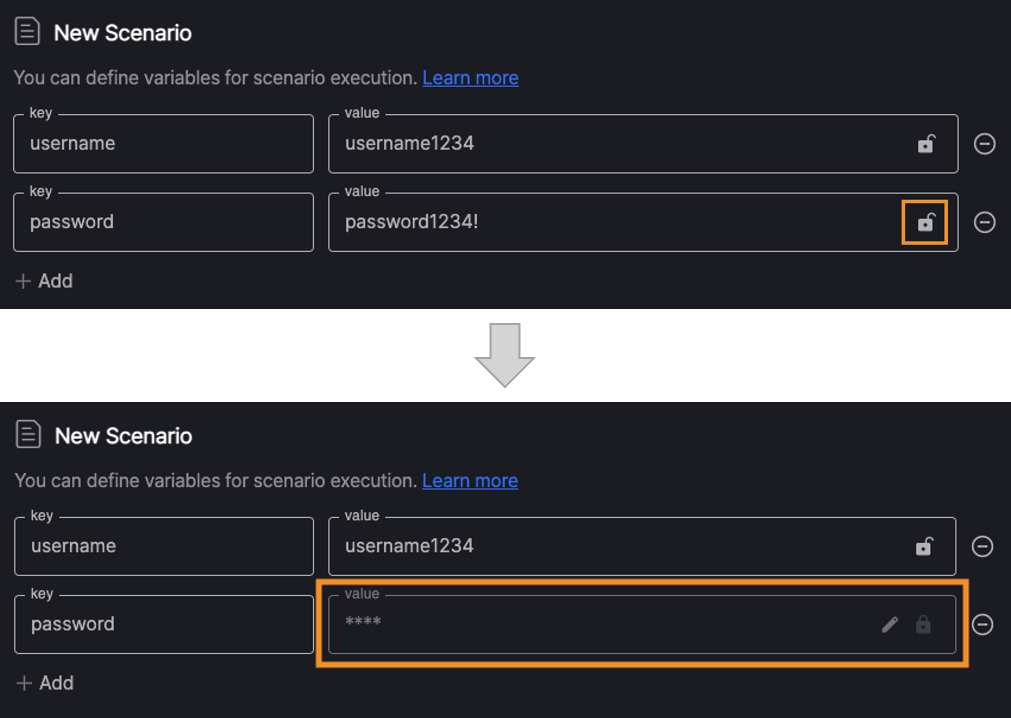
To edit an encrypted Value, click the edit icon  .
.
When editing, the existing Value will be cleared and must be re-entered.

The Difference between User Variables and Store Value #
User Variables are similar to the Store Value action, but differ in when and how values can be used.
- User Variables are available from the beginning of the scenario, starting with the first step.
- Store Value, by contrast, makes the value available only after the step in which it is defined.
When to Use Each
- Use User Variables for values that need to be predefined and reused across the entire scenario. (e.g., username, phone number)
- Use Store Value when a value is generated dynamically during test execution and only needs to be used later. (e.g., values extracted from screen text)
For more information, see Store Value.
Using User Variables #
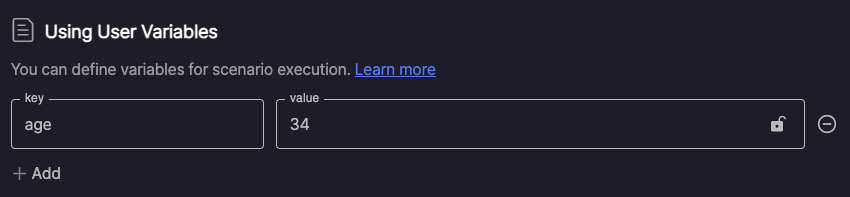
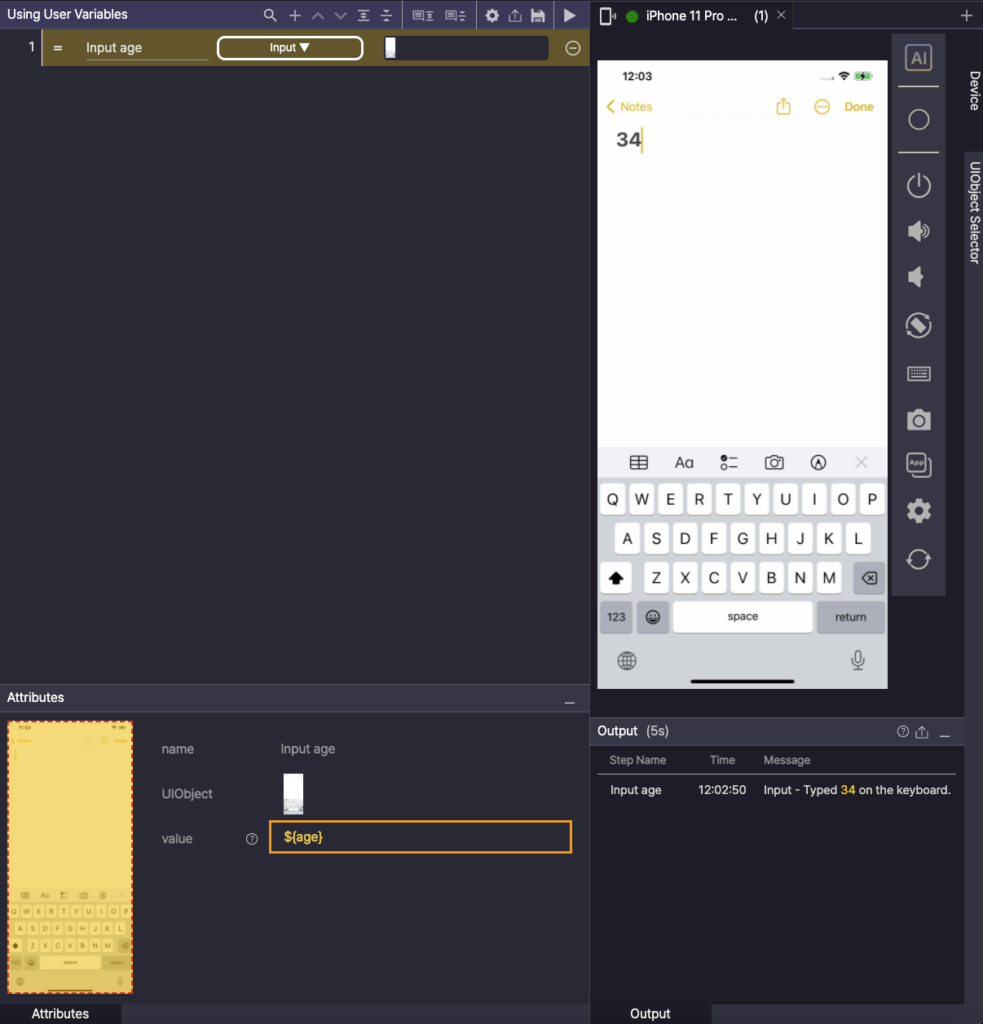
To use a User Variable in your scenario, enter it in the ${Key} format.
The system will recognize this format as User Variable, not plain text, and automatically replace it with the value assigned to that key during execution.
For example, if you have a User Variable named age with a value of 34, entering ${age} in a step will insert 34 at runtime.
Important: You must use the ${Key} format for the variable to be recognized correctly.
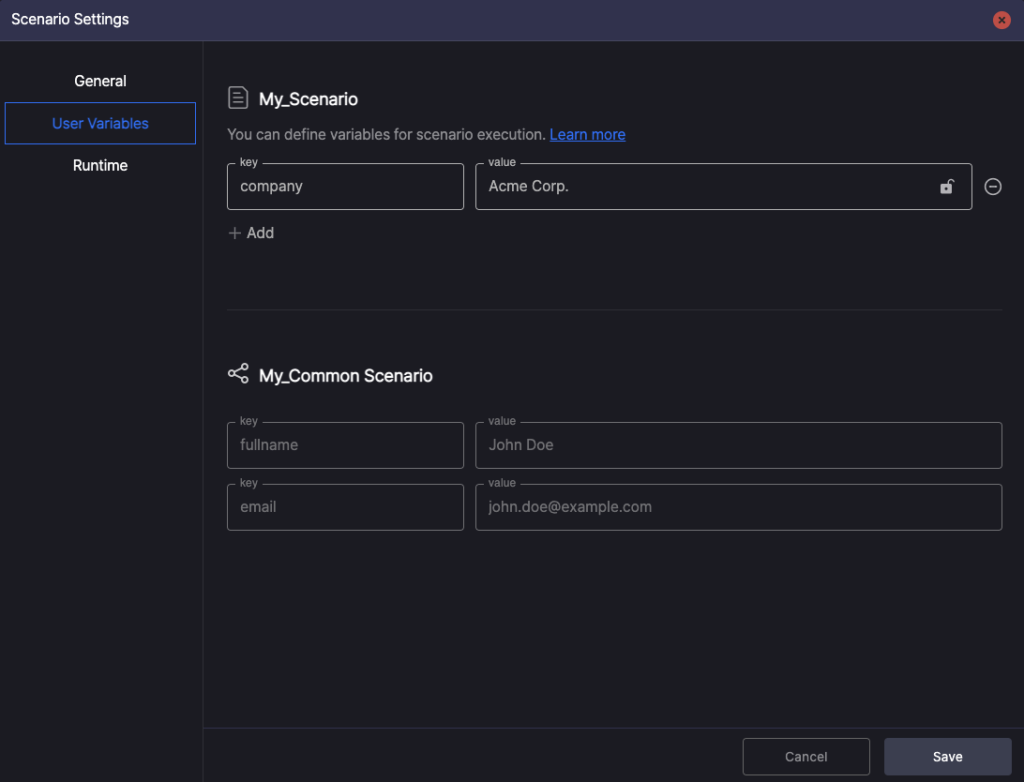
Using User Variables in a Common Scenario #
When a scenario includes a Common Scenario,
any User Variables defined within it are automatically listed under Scenario Settings > User Variables.
What is System Variables? #
In addition to User Variables, you can also use System Variables, which are automatically provided by the system.
System Variables begin with the @ symbol and do not require any manual configuration.
They are populated automatically at runtime, making it easier to build flexible and fully automated scenarios.
Below is a list of available System Variables for use in your scenarios.
| System Variable | Description | Editable |
|---|---|---|
@OS | Operating system of the device (e.g., Android, iOS) | No |
@OS_VERSION | Version of the operating system (e.g., 14.4, 13.0.1 등) | No |
@MODEL_NAME | Model number of the device (e.g., SM-G991N) | No |
@DEVICE_NAME | Name of the device | No |
@ACTIVE_APP_ID | Package name or bundle ID of the currently active (mirrored) app | No |
@HTTP_PROXY_SERVER_URL | Proxy server URL used for collecting HAR (HTTP Archive) data | No |
@HTTP_PROXY_PORT | Port number of the proxy server | No |
@AUTHORING_MODE | Returns ON if the scenario is running in the authoring environment (Stego), OFF if in validation (Ptero) | No |
@CLIPBOARD | Value currently stored in the clipboard | Yes |
@WAIT_FOR_NAVIGATION_TIMEOUT | Delay time between steps, often used to wait for screen transitions (in milliseconds) | Yes |
@PHASE | Stores a label used in Ptero test results | Yes |