
Implementing test cases using Stego is simple, intuitive, and designed to be easy for anyone to follow.
- Launch Stego.
- Connect devices to Stego.
- Set up the workspace by creating a new workspace or opening an existing one.
- Create new scenarios or select existing ones.
- Configure the scenario steps by adding new steps or modifying existing ones.
- Run tests using the configured scenarios.
Downloading and Installing Stego #
You can download the trial version of the Stego for both Mac and Windows from Apptest.ai’s official website.
Once downloaded, run the installation file to complete the setup.
Note: Stego will automatically update to the latest version if a new update is available when launched.Connecting Devices in the Device Farm #
You can remotely connect to devices in the Device Farm for control and testing.
Connecting a Device #
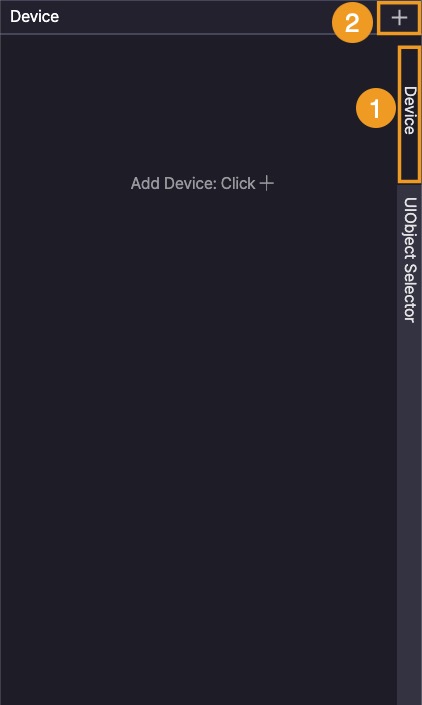
- Click the Device tab in the top-right corner of Stego.
- Click the “+” button to open the Add Device window.
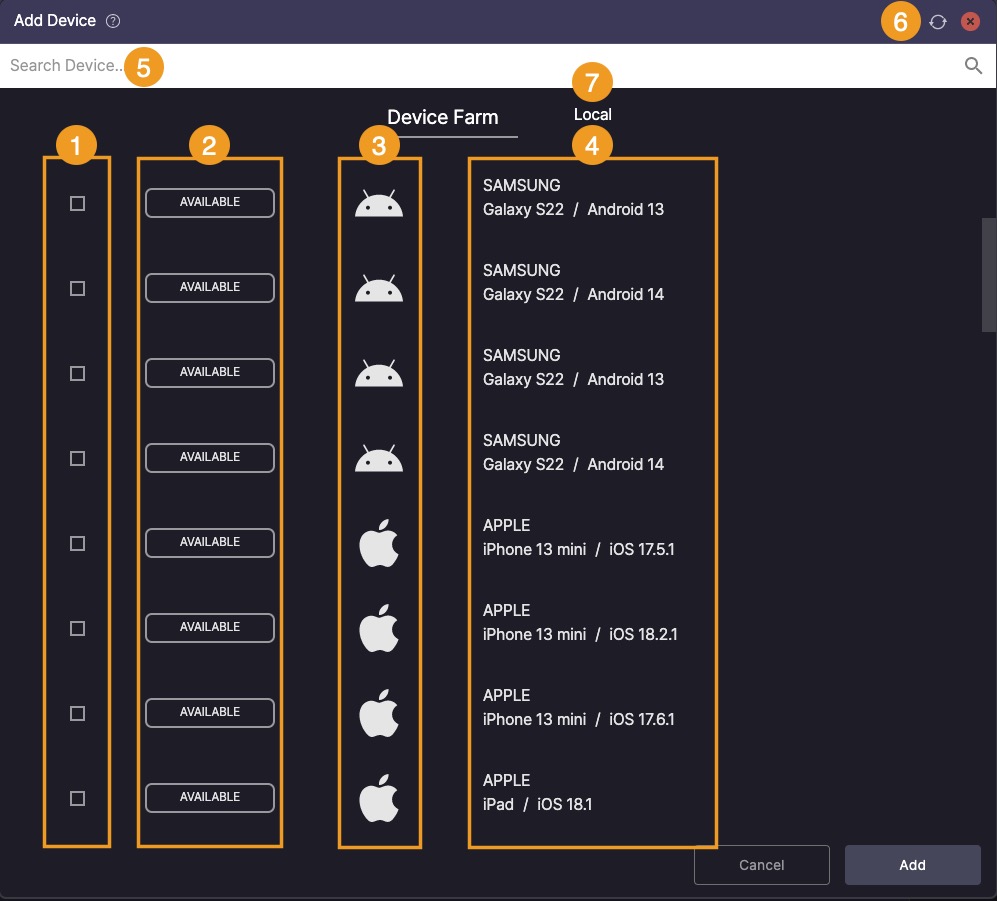
- In the list, select the checkbox for any device marked as AVAILABLE.
- Once selected, the checkbox will appear as
 .
. - Unchecking it will deselect the device.
- Once selected, the checkbox will appear as
- Device Status:
 : Device is available for connection.
 : Device is currently connected.
 : Device is being used by another user or by Ptero; cannot be forcibly disconnected.
 : Device is currently rebooting.
 - View the OS type for each device.
- View the manufacturer, model name, and OS version for each device.
- Use the search bar to filter device information.
- Click the
 icon to update the device list in real time.
 - To connect a device locally, please contact: contact@apptest.ai.
Up to 4 devices can be connected simultaneously.
After selecting the desired devices, click Add to connect them.

You can view the model name of each connected device in the Device tab (top-right corner).

Once added, a new tab will be created for each connected device.
Disconnecting a device #
- To disconnect a device, click the
 icon next to it.
 - If a device remains inactive for 10 minutes, a timeout popup will appear.
If no action is taken for 1 additional minute, the device will be disconnected automatically.
Entering the Access Key #
By entering the Access Key for your Ptero account in Stego > Settings > Ptero,
you can seamlessly integrate with Ptero’s Scenario Repository and directly upload scenarios created in Stego.
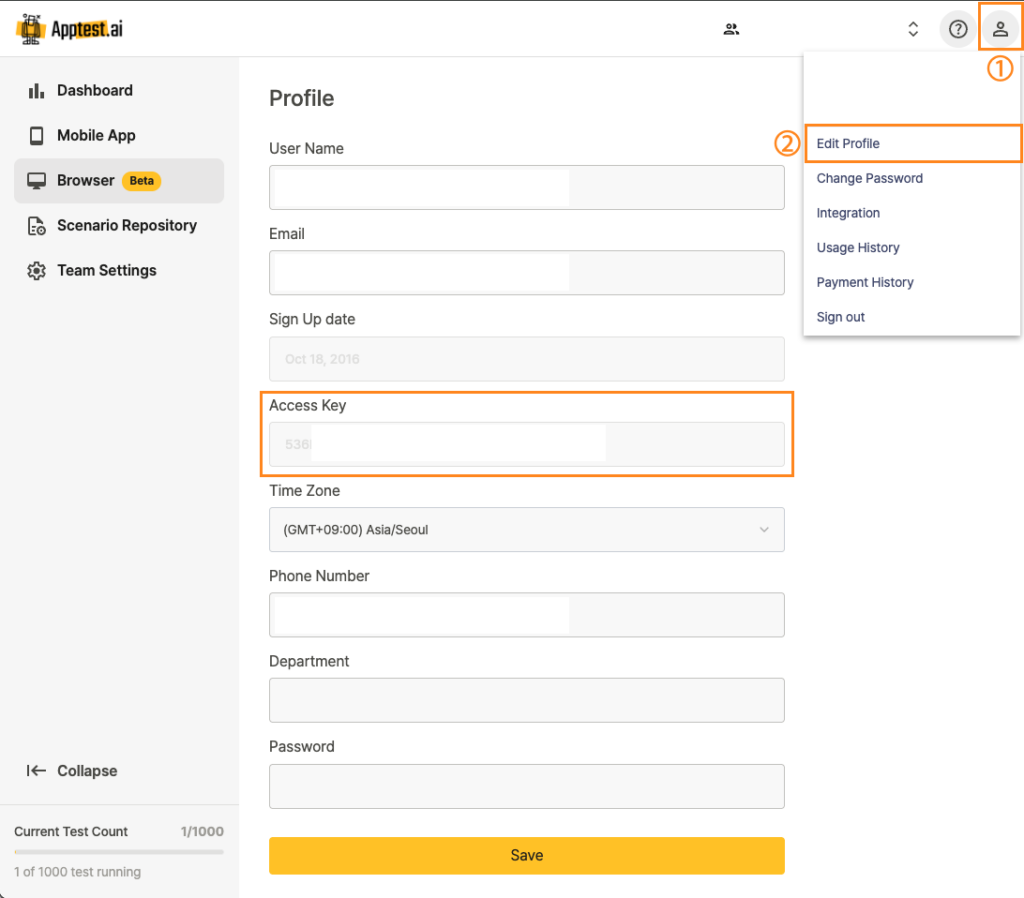
Log in to Ptero(app.apptest.ai) and navigate to ① My Profile > ② Edit Profile to find the Access Key.

Enter the Access Key from your profile into ① Settings > ② Ptero > ③ Access Key in Stego, then click ④ Save.