
Upload and manage scenarios created in Stego.
Teams can share scenarios across projects and organize them by folders (e.g., Cart, Payment, Login, Registration).
Only scenarios stored in Scenario Repository can be used when creating Scenario Test Suites.
Main view #
View scenario folders in a table format. Use the search box in the upper right to search by name.
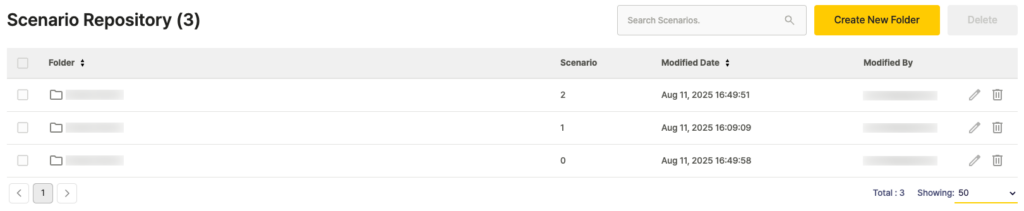
- Folder: Scenario folder name
- Scenario: Number of scenarios in the folder
- Modified Date: Last modification date and time
- Modified By: User who last modified the folder
- Edit (pencil icon): Edit folder name
- Delete (trash icon): Delete folder
Folder view #
Click a folder to view and manage the scenarios inside it. Use the search box in the upper right to search by name.

- ID: Scenario ID
- Scenario: Scenario name
- File Name: Scenario file name
- Modified Date: Last modification date and time
- Modified By: User who last modified the scenario
- Link (link icon): View projects and Test Suites using this scenario
- Download (download icon): Download scenario
- Edit (pencil icon): Edit scenario name or file
- Delete (trash icon): Delete scenario
Add Scenarios Manually #
Add scenarios to the repository by uploading .stego files exported from Stego.
- Click Create New Folder, enter a name, and create the folder.
- Select the folder you created.
- Click Add Scenario, enter the scenario name, upload the
.stegofile, then click Add.
For easier team-wide management, prefer Stego-Ptero integration upload over manual file upload.
For details on integration upload, see Uploading Scenarios to Ptero.
Download Scenarios #
Download .stego scenario files from the Scenario Repository for editing in Stego.
In the Folder view, click the Download icon next to the scenario you want to download.
For details on importing downloaded files into Stego, see Uploading Scenarios to Ptero.