
Checking Results in the Output Panel #
After executing the scenario, test results are displayed in real-time in the Output Panel.
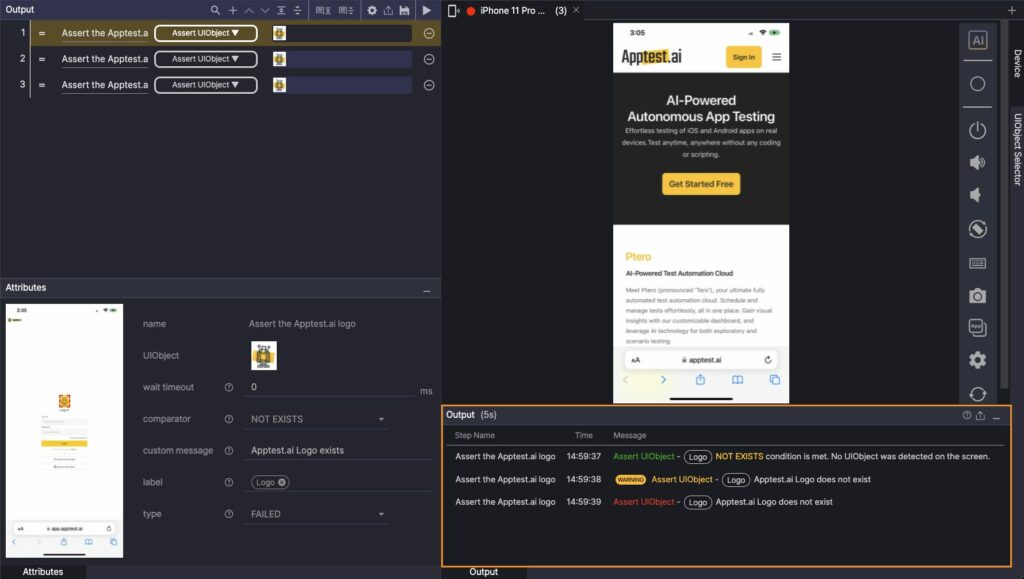
(Example: The Output Panel displays the step name, execution time (hh:mm:ss), and related messages.)
When an Assertion action is included, the test results are color-coded based on the outcome:
– Green for Passed
– Yellow for Warning
– Red for Failed
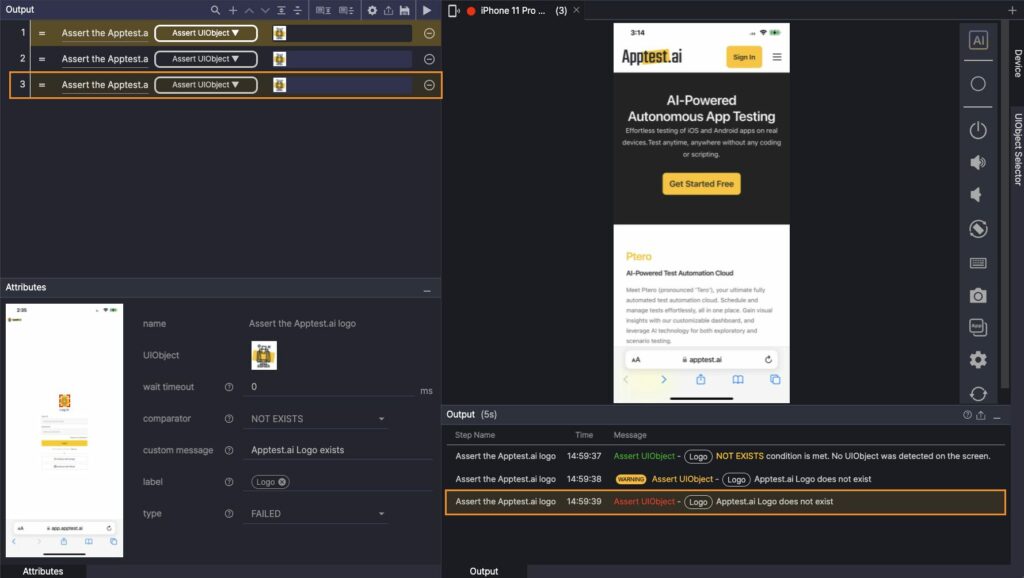
When you hover over a step in the Output panel, the corresponding step in the Scenario Editor is highlighted, making it easy to identify where the execution took place.
Viewing Step Results in the Output Panel #
Clicking a step in the Output panel opens the Step Result window.
This window allows you to check whether the step was executed successfully and review how it was executed on the actual device.
You can compare the authoring screen with the execution screen and review the associated UIObject information to thoroughly examine the test result.
If an error occurs, this view allows you to identify the time and location of the issue.
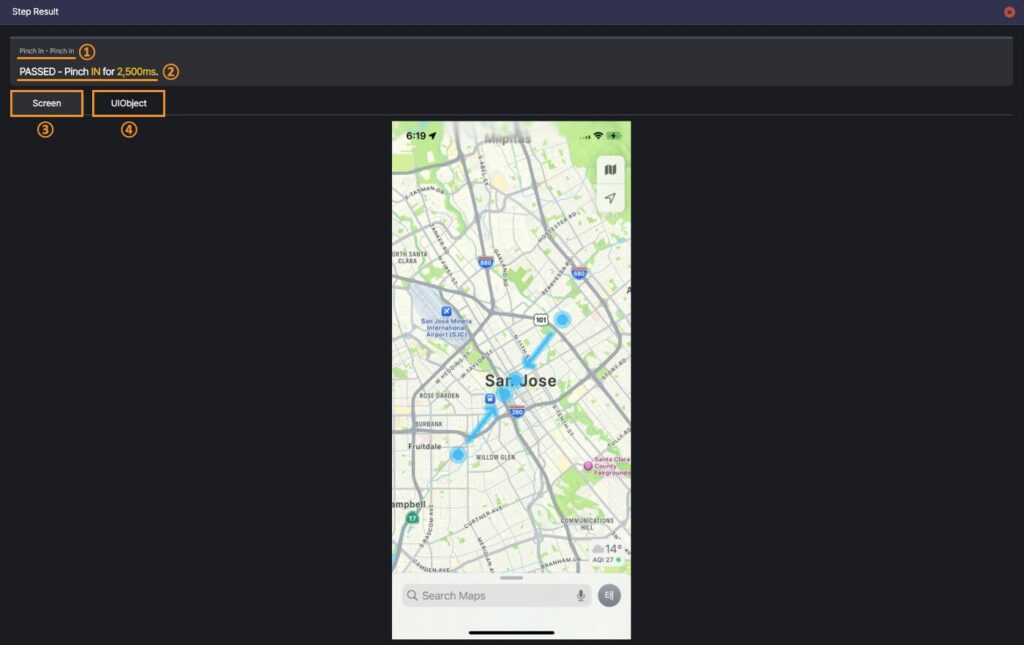
① The name of the executed step is displayed.
② The result message for the executed step is shown.

③ The Screen tab displays a screenshot of the actual device at the time of execution.
– This allows you to visually verify the UI state in which the touch or action was performed.
④ The UIObject tab displays information about the UI elements that appeared on the screen during both the authoring and execution stages.
– This allows you to compare or verify properties, positions, and states of the target elements.
Screen #

Clicking a screenshot in the Screen tab opens the full-screen view.
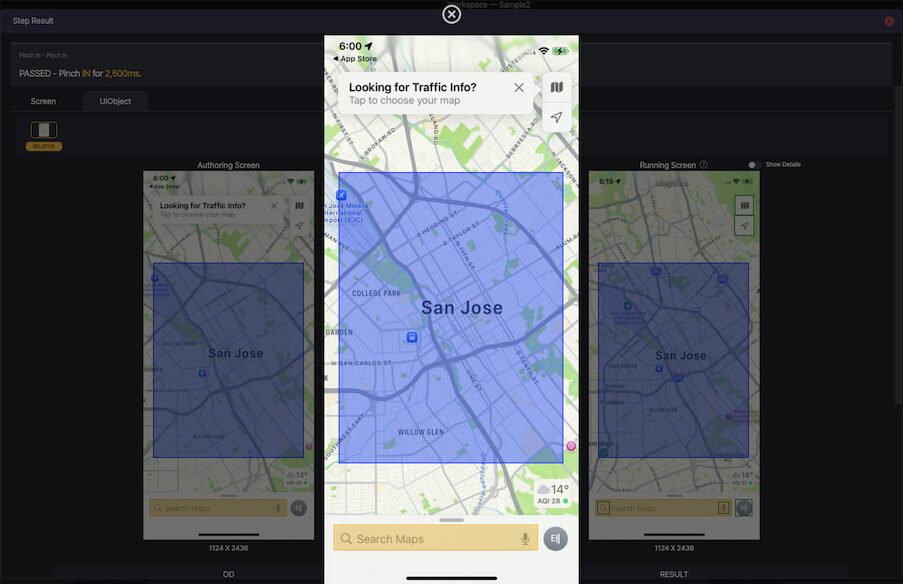
UIObject #
The UIObject tab provides detailed information about the UI elements captured during both authoring and execution.
You can compare the authoring and execution screens to review how each step was executed.
This allows you to confirm whether the test ran as intended.
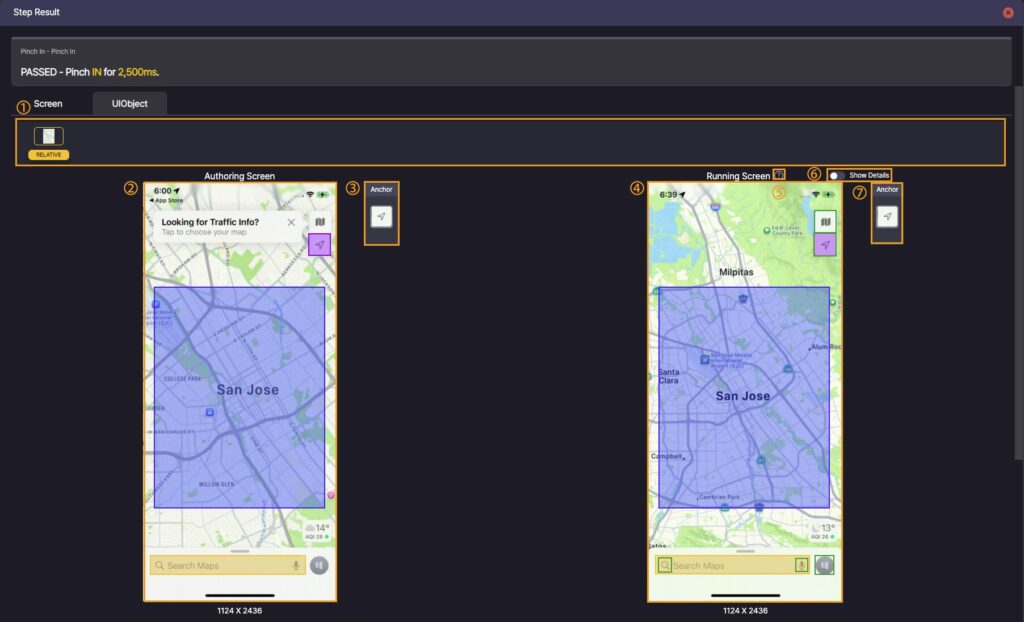
① Displays the list of UIObjects used in the step.
② Shows the screen image and resolution captured during scenario authoring.
③ If an Anchor was used, it will also appear in the view.
– Clicking the Anchor highlights its attribute details in section ⑧.
④ Shows the screen image and resolution captured during test execution.
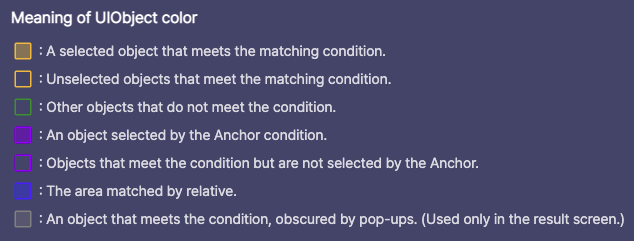
⑤ Hover over the ‘?’ help icon to see the meaning of each UIObject color.
⑥ Click the detail view button to view the UIObject information from the Running Screen (i.e., the screen captured during test execution).
– This button is disabled if the object matched successfully, and enabled if the match failed.
⑦ Clicking the Anchor displays its Attributes from the Running Screen.
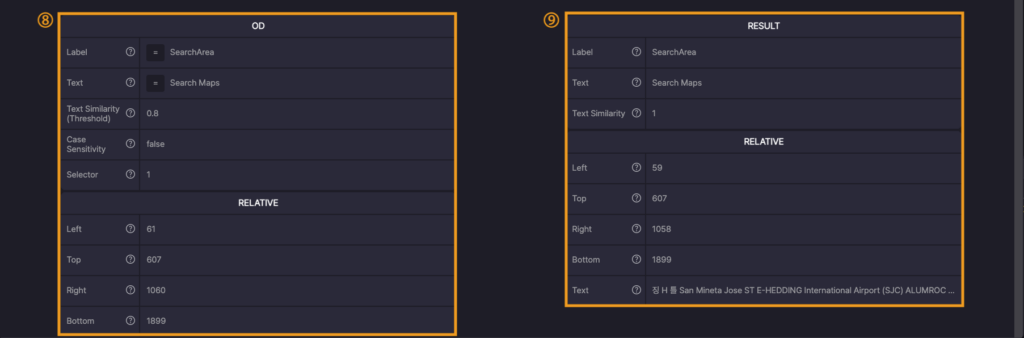
⑧ Shows the properties of the UIObject used during scenario authoring.
⑨ Shows the properties of the UIObject matched during execution.
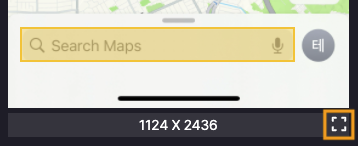
Hover over the resolution of the authoring or execution screen, and click the  button that appears to expand the screen to full view.
Exporting Test Results #
Exporting as a ZIP File #

After completing the test, you can export the test results by clicking the Export Test Results button ( ) in the Output panel.
Exporting scenario execution results is useful for analyzing errors or seeking additional support.
The exported file is compressed in .zip format and contains logs, execution screen images, and other relevant data.
Sharing the exported file allows you to provide detailed test results and receive feedback for troubleshooting.
Encrypting ZIP Files #
- For macOS (OSX):
- Create a secure disk image and set it as the Workspace to encrypt the test result files.
- For Windows:
- Use Folder Properties > Advanced Attributes > Encrypt contents to secure data to encrypt the test result files.
Troubleshooting & Support Requests #
If an error occurs during scenario execution or additional support is needed, follow these steps.
- Describe the issue: Provide a brief explanation of the problem or the support needed.
- Attach the file: Include the exported test result file (.zip format).
- Send an email: Email the description and the attached file to contact@apptest.ai.