
You can run tests on specific devices at predefined times without manual intervention.
(Method 1)
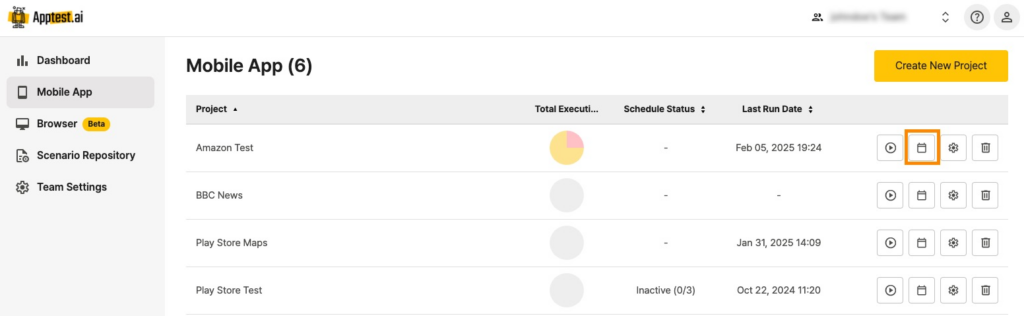
You can access the schedule settings by clicking the calendar icon next to the project name,

(Method 2)
or by selecting the project and clicking ‘Schedules’ in the top menu bar.
Schedule Settings #
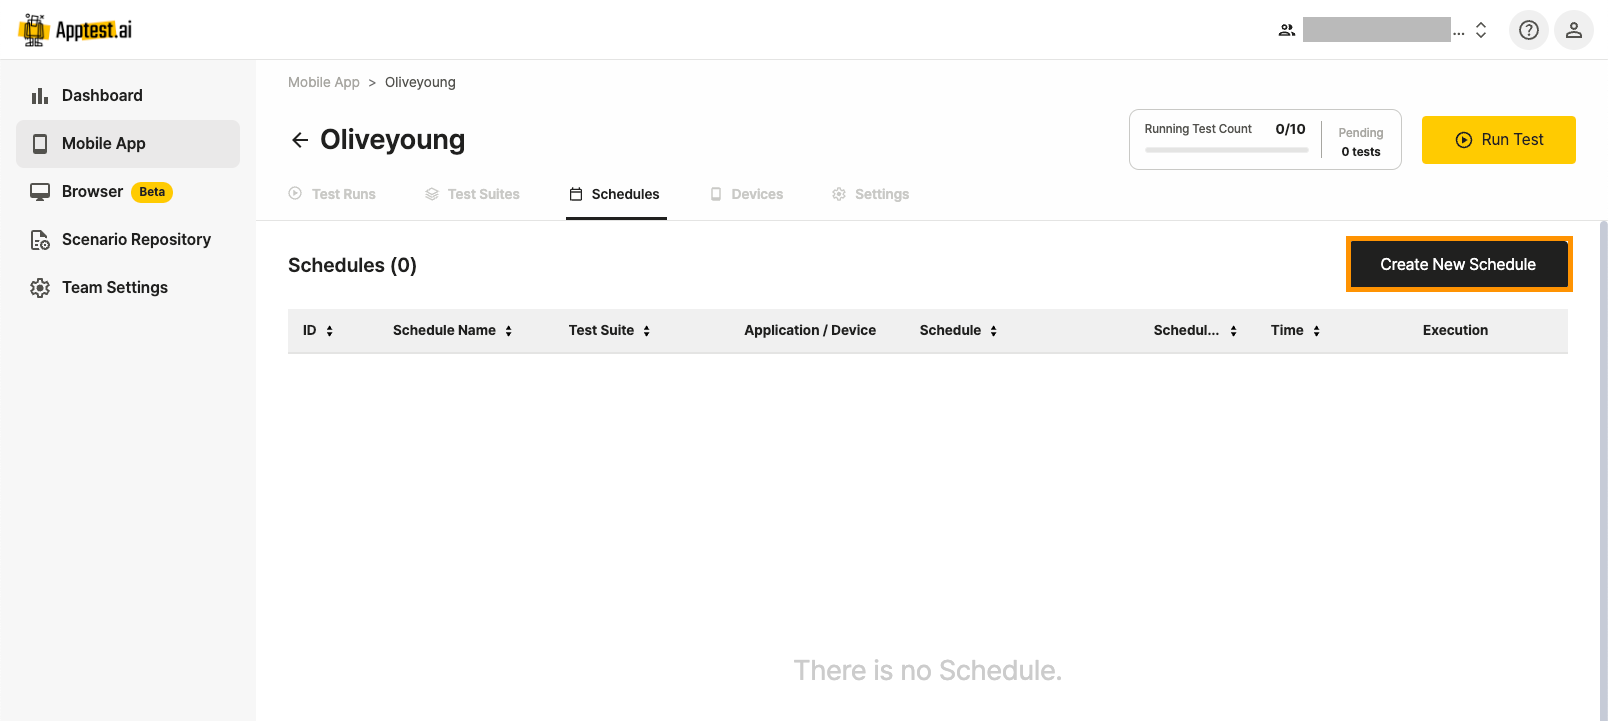
Click the ‘Create New Schedule’ button in the schedule settings.
The popup window contains the following components:
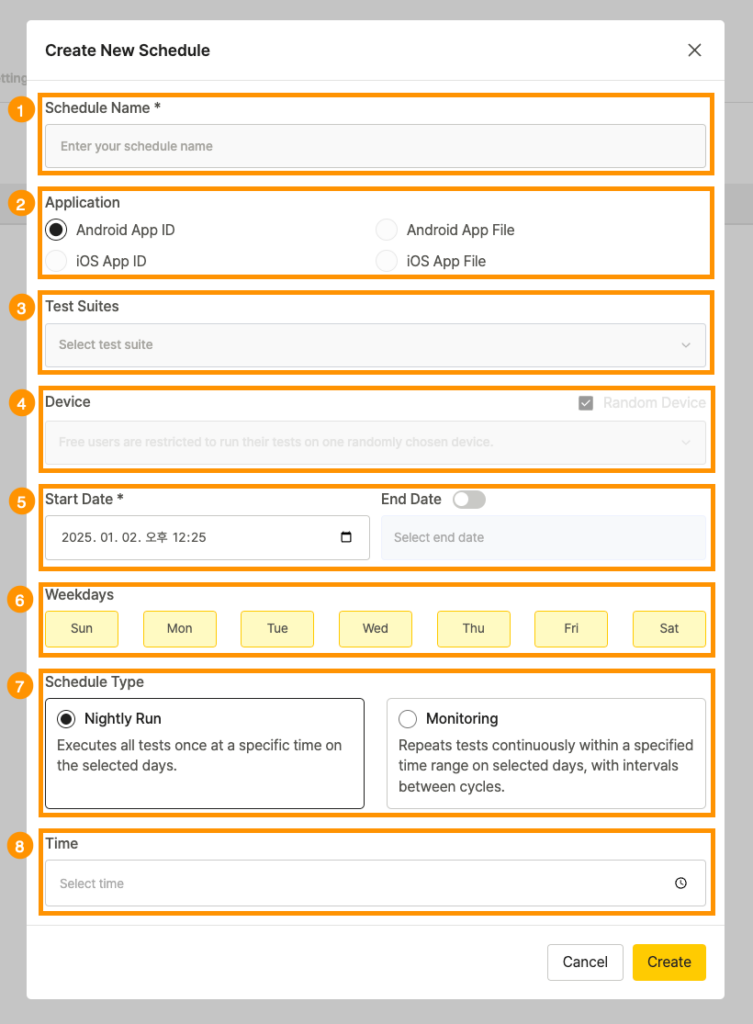
- Schedule Name: Display the schedule name. Names must be unique within the project.
- Application: Select the app to be executed by creating a schedule. The app can only be chosen from the pre-configured items in the project’s Settings > Application.
- Test Suites : Select one and more scenarios to execute.
- Device : Set the device for test execution. When Random Device option is checked, tests will run on a randomly selected available device.
- Start Date / End Date : Set the start and end dates for the schedule.
– If End Date is disabled, the schedule will remain active indefinitely from the Start Date.
– If End Date is enabled and set, the schedule will only be active within the specified period. - Weekdays : Select one and more days of the week on which the test will run.
- Schedule Type : Select the type of schedule.
– Nightly run : The test will be executed once at the specified time on the selected days. All tests will be created and run simultaneously.
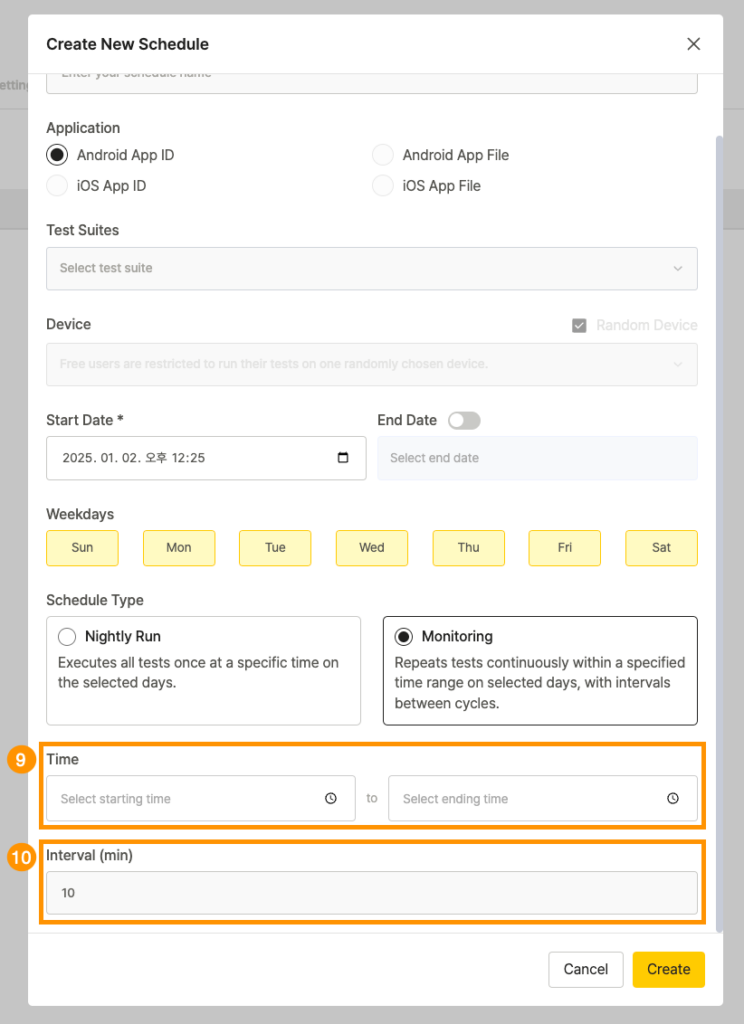
– Monitoring : The test will be executed sequentially over the specified time range on the selected days. After the test is completed, the system will wait for the set interval (in minutes) before starting again. - Time
– For Nightly run : Set the time for testing.
– For Monitoring : Set the start and end times for testing. - Interval (Monitoring only) : (Available when Monitoring is selected) Set the wait time (in minutes) after all tests are completed.
Click the Create button to save the schedule.
Schedule Activation #
When a schedule is created, it is set to a disabled state.
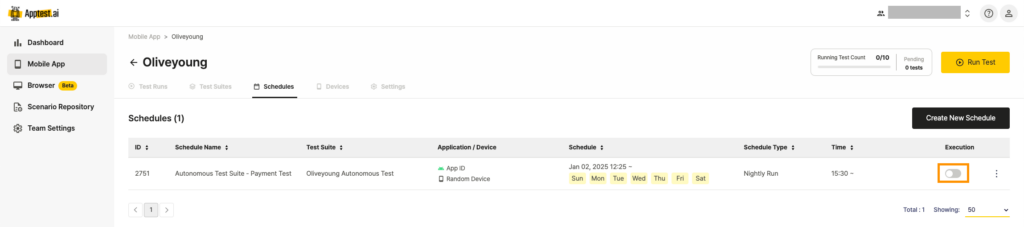
(Schedule disabled state)
To activate a schedule, click the switch in the Execution column.
To deactivate it, click the same button again to switch it to the disabled state.
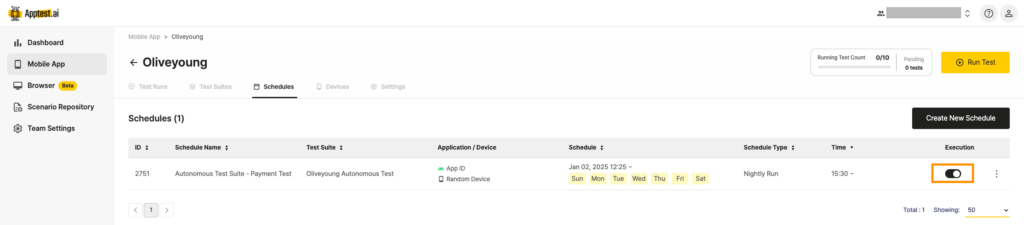
(Schedule enabled state)
Schedule Management #
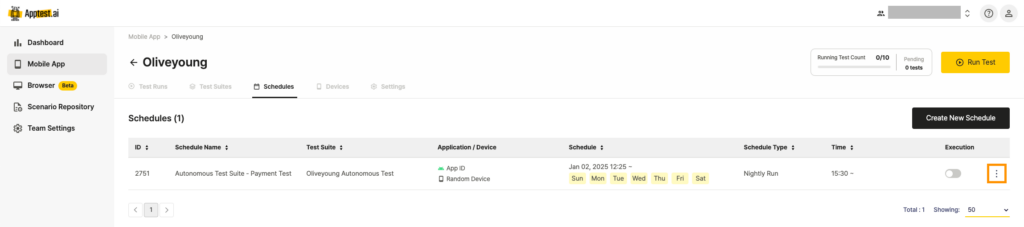
Schedules can be copied, edited, or deleted.
Click the kebab menu icon to the right of the Execution button of the schedule to modify to open the related menu.
(Note: Active schedules can only be copied. To edit the settings, deactivate the schedule first.)
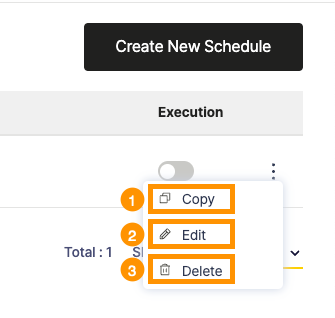
- Copy : Duplicates the selected schedule to create a new one with the same settings. The duplicated schedule will be created in a disabled state.
- Edit : Edits the settings of the selected schedule. When the schedule settings window opens, you can review the existing settings.
- Delete : Removes the selected schedule.