
This section explains how to run scenarios on connected devices and check their results.
You can run all steps in sequence, run only specific sections, or stop execution at any time.
After running, results can be reviewed in the Output panel and in Step Results for detailed analysis.
Running Scenarios #
After connecting a device, you can run scenarios in two different ways:
- Run all steps
- Run specific sections
To learn more about connecting a device, see [Stego User Guide > 3.0. Connecting to Device Farm].
Run All Steps #
Runs all steps in your scenario in order.

- Click the run button (▶) at the top of the Scenario Editor panel
- Keyboard shortcut: Ctrl+D (Windows), Cmd+D (macOS)
Run Specific Sections #
Runs only selected parts of your scenario.
- Play Only: Runs the selected step only, then stops immediately.
- If the step includes child steps (e.g., Block or Common Scenario), all child steps are also executed.
- Play Until the End: Runs from the selected step to the last step of the scenario.
- Play Until This Step: Runs from the first step up to the selected step.
- Play Selected: Runs only the selected steps.
Stop Running #
You can stop scenario execution at any time. This is useful for stopping long-running scenarios immediately.

Click the Stop button (■) at the top of the Scenario Editor panel.
Check Scenario Results #
Scenario results can be reviewed in the Output panel.
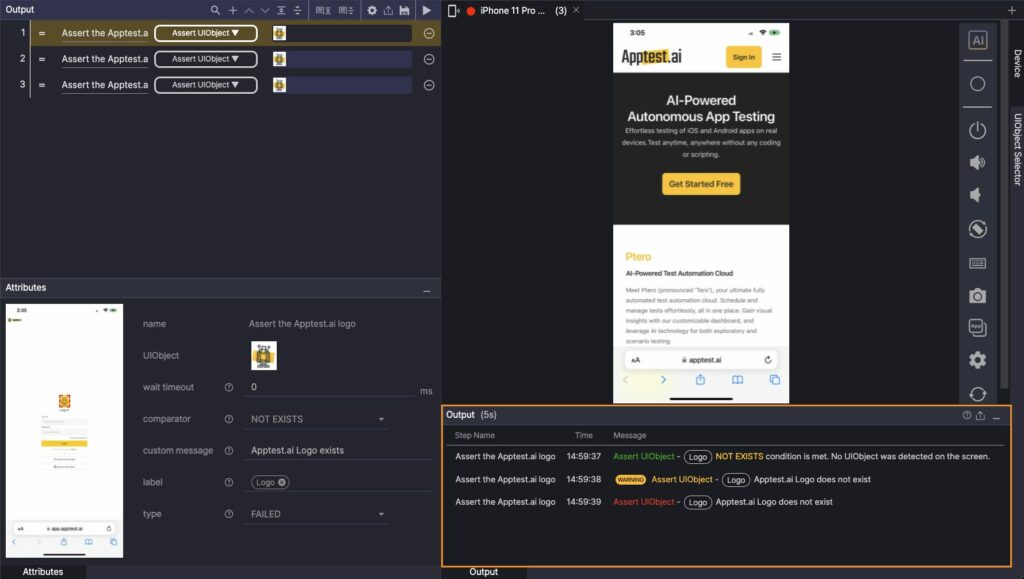
- Step Name: Name of the executed step
- Time: Step execution time
- Message: Run message for the step
- Assertions are color-coded based on run results.
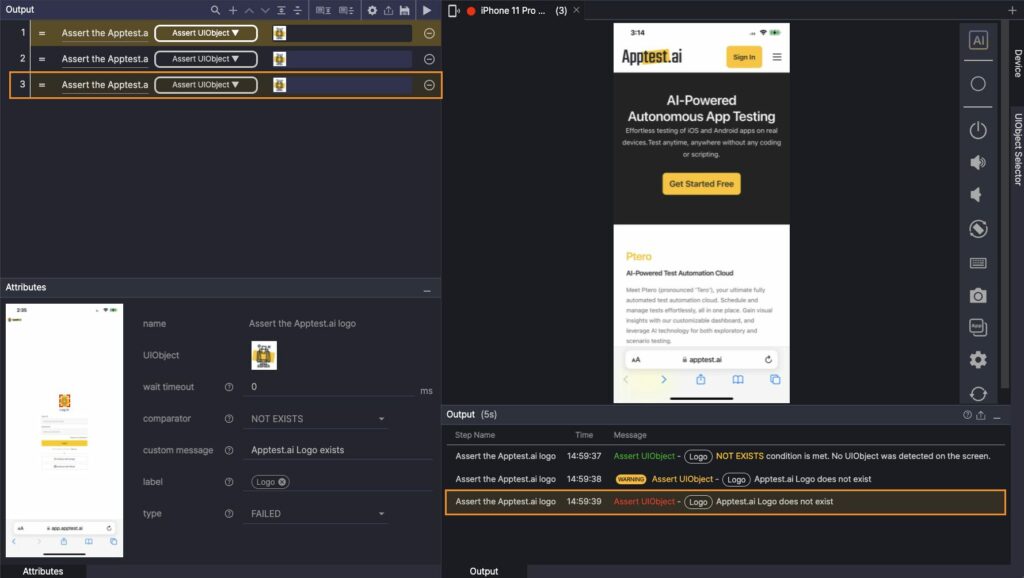
When you hover over a step in the Output panel, it is highlighted in the Scenario Editor.
Check Step Results #
Click a step in the Output panel to open Step Results.
Here you can compare the screen used when creating the scenario with the screen captured during execution.
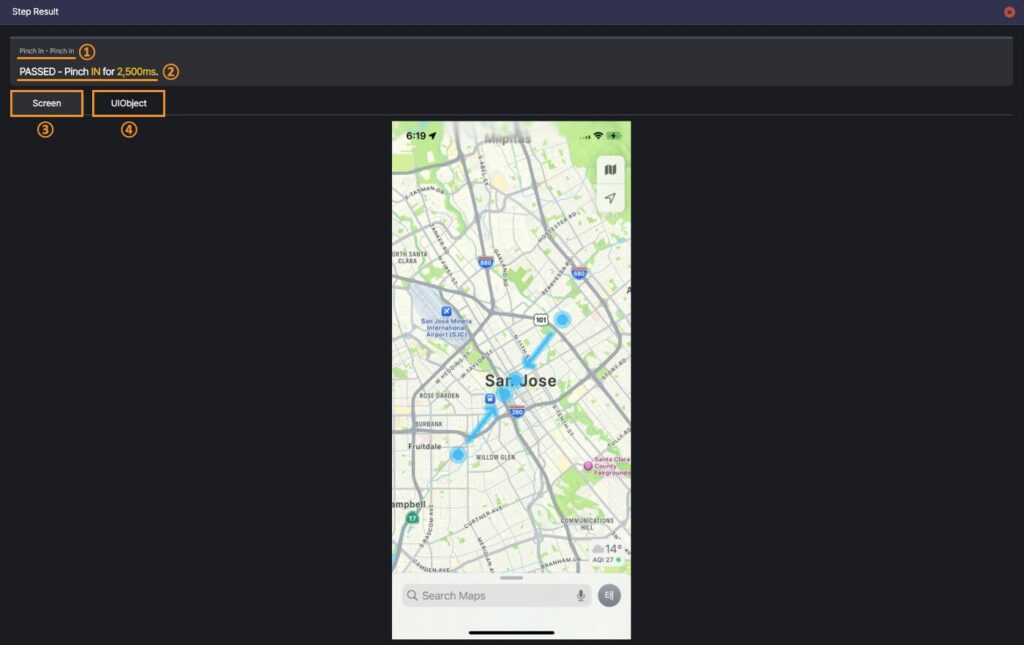
- Step Information: Displays the executed action and step name
- Run Result Message: Shows the result message
- If a Label or Custom Message is set, it is also displayed
- If a Label or Custom Message is set, it is also displayed
- Screen: Displays the device screen captured during execution
- Click the screenshot to view it in full screen.
- Click the screenshot to view it in full screen.
- UIObject: Compares the configured UIObject with the one detected at runtime

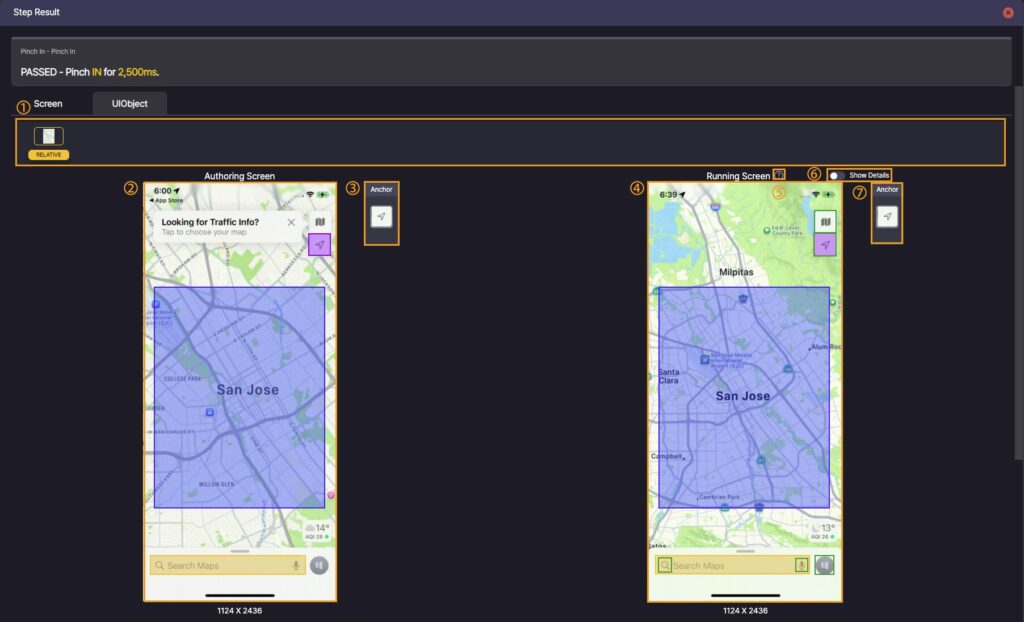
- Creation Information
- ① UIObject Field: UIObject configured in the step
- ② Authoring Screen: Screen image and resolution at the time of step creation
- ③ Anchor: Anchor set in the UIObject
- Click the Anchor icon to view its attributes
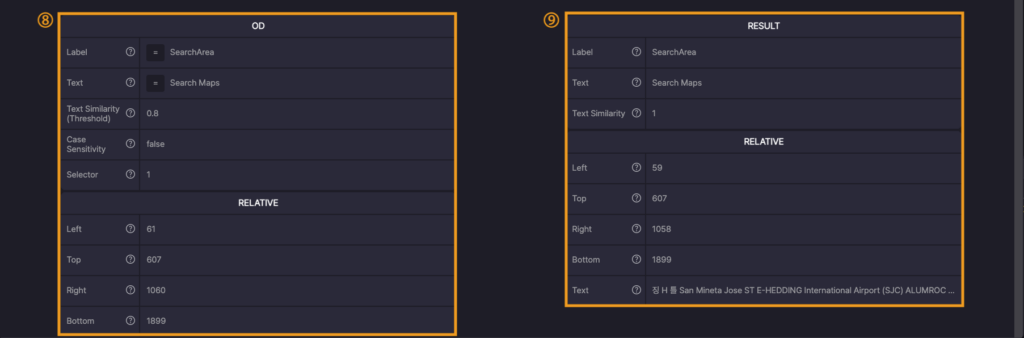
- ⑧ UIObject Attributes (Authoring Screen): Attributes of the configured UIObject
- Run Information
- ④ Running Screen: Screen image and resolution captured during execution
- ⑤ Info Icon: Hover to view the meaning of UIObject colors
- ⑥ Show Details: Displays UIObject color meanings on the Running Screen
- ⑦ Anchor: Anchor detected during execution
- Click the Anchor icon to view its attributes
- ⑨ Running Screen UIObject Attributes: Attributes of the detected UIObject
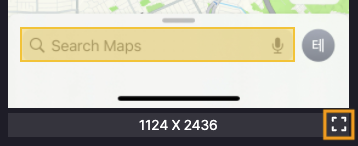
- Full Screen View
- Click the screenshot resolution displayed below each screen (e.g., 1124 × 2436) to enlarge it to full screen