
Running Mobile App Test #
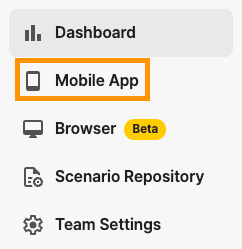
Step 1. To run a test on Mobile App, click the Mobile App button in the left menu bar.
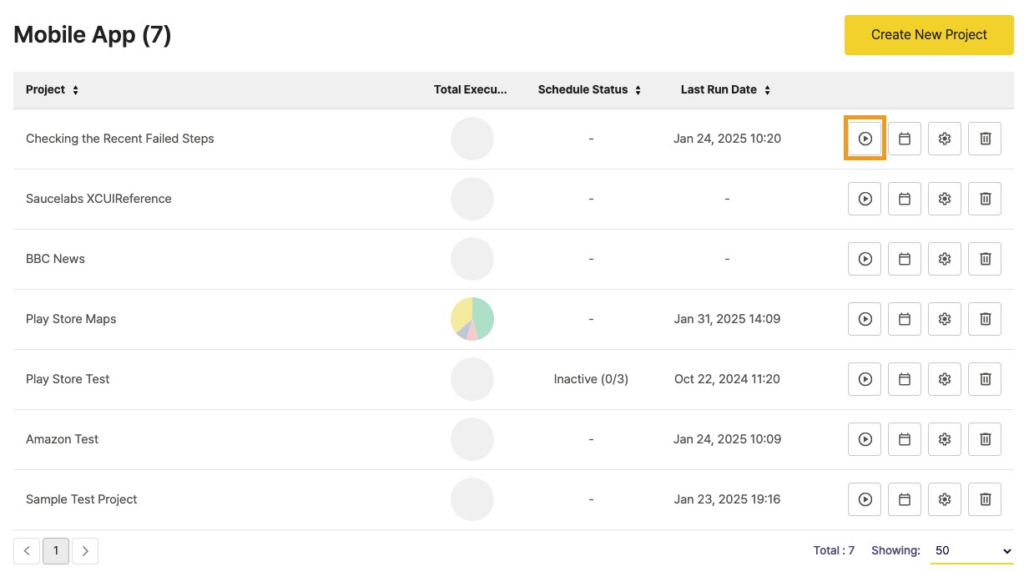

Step 2. Either click the test execution button for the project to test, or enter the project and click the Run Test button in the upper right corner.
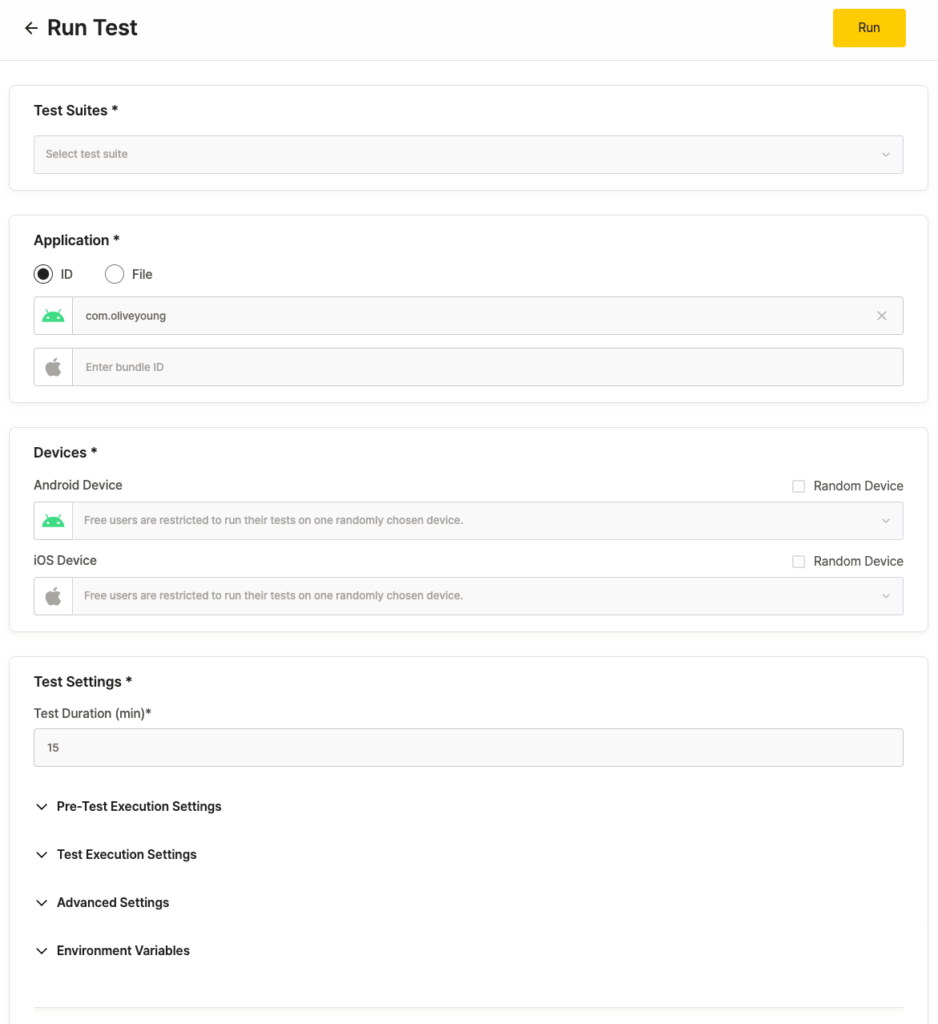
Step 3. Configure your Test Suite settings, app information, device settings, test duration, device language, app file re-signing options, feature settings, and environment variables.
Step 3-1. Test Suite Settings
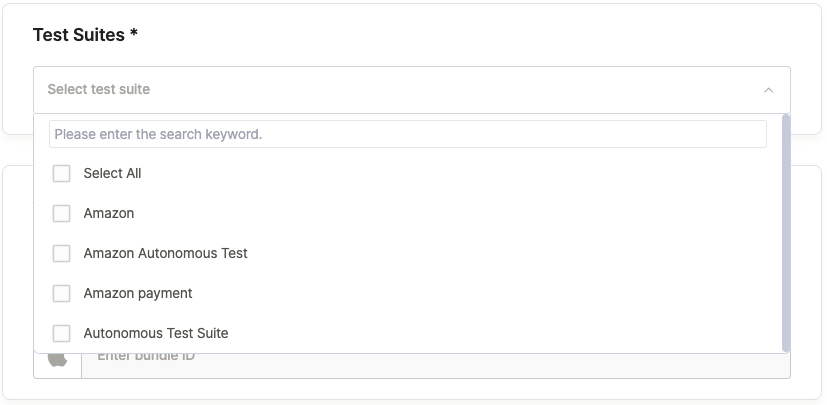
Click the Test Suite section to display a list of available Test Suites.
Select the Test Suite for testing.
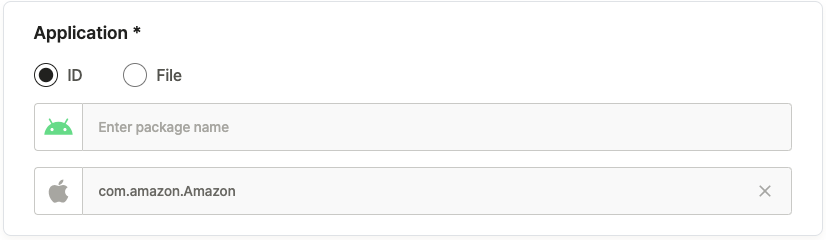
Step 3-2. Application Settings
Select either the app ID or app file that you saved in the project settings.
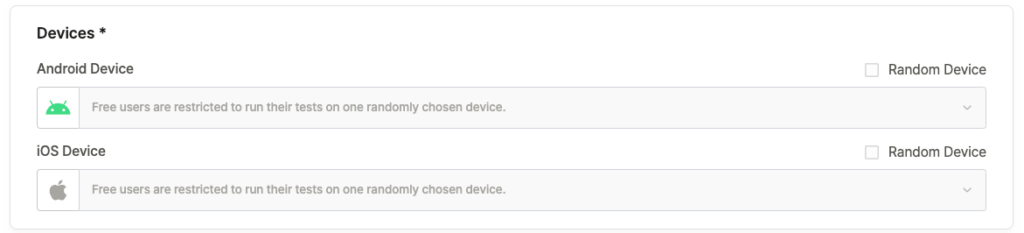
Step 3-4-1. Device Settings – For Free Users
For free users, check the Random Device checkbox for the OS platform matching the app.
A device will be randomly selected from the available devices for that OS platform.
To select a specific device, you need to upgrade to a paid plan.
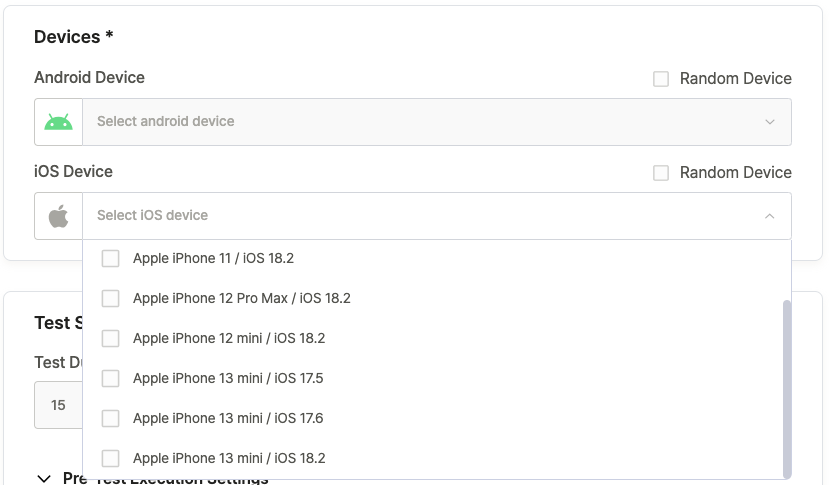
Step 3-4-2. Device Settings – For Paid Users
Paid users can either select specific devices from the Device Lists or set them to random.
For users with an on-premise plan, additional customized Private Devices can be configured and used.

Step 3-5. Test Duration Settings
You can set the duration from a minimum of 5 minutes up to the maximum time allocated to your account, with a default setting of 15 minutes.

Step 3-6-1. Device Language Settings
You can set the language for the device that will run the test.
Step 3-6-2. App File Re-signing
When enabled, the app file will be re-signed before test execution.
This helps prevent issues related to certificates and permission settings. This feature is enabled by default.
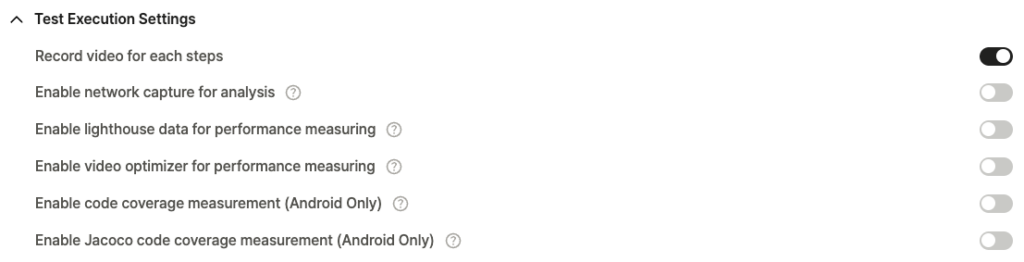
Step 3-7. Specify test execution settings (Optional)
- Record video for each steps: Configure whether to record videos for each step. Default is True.
- Enable network capture for analysis: When enabled, collects app network traffic as HAR (HTTP Archive) data for analysis.
- Enable lighthouse data for performance measuring: When enabled, collects Lighthouse data to measure app performance, including page load speed and user experience metrics.
- Enable video optimizer for performance measuring: When enabled, uses AT&T Video Optimizer to analyze video performance of the app, helping improve media content quality and performance.
- Enable code coverage measurement (Android Only): When enabled, measures the percentage of Android app code executed during testing, helping evaluate test coverage.
- Enable Jacoco code coverage measurement (Android Only): When enabled, uses the JaCoCo tool to measure Android app code coverage, providing detailed analysis of code executed.
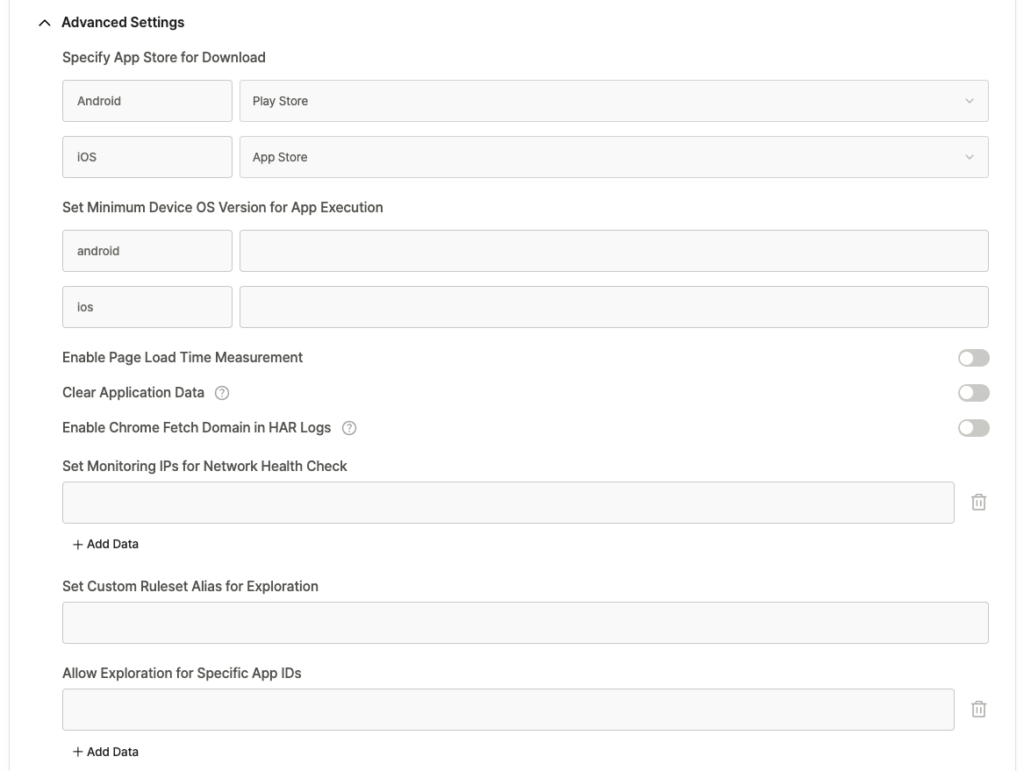
Step 3-8. Advanced Settings (Optional)
Configure additional detailed options. Tests can be executed without configuring these settings.
- Specify App Store for Download: Set the store for app installation. Defaults are PlayStore for Android and AppStore for iOS. TestFlight is also available for iOS.
- Set Minimum Device OS Version for App Execution: Set the minimum OS version required for app. Can be configured separately for Android and iOS. Devices are allocated from the Queue based on the specified version requirements.
- Enable Page Load Time Measurement: Configure collection of Time to Interactive (TTI) information. Default is false.
- Clear Application Data: Set whether to clear target application data. It used to delete data from protected apps. Default is false.
- Enable Chrome Fetch Domain in HAR Logs: Configure the use of Chrome fetch logs when collecting HAR data. Default is false.
- Set Monitoring IPs for Network Health Check: Set IP addresses for health checks during testing. Ping commands are sent to configured IPs to log device network connection status.
- Set Custom Ruleset Alias for Exploration: Configure aliases for custom rules used in autonomous exploratory testing. Specify aliases within rule files that determine when specific scenarios are executed.
- Allow Exploration for Specific App IDs: Set the list of packages allowed during autonomous exploratory testing.

Step 4. Running the Test
After completing all settings, click the Run button in the upper right corner of the page.
Clicking Run will redirect you to the project’s test list page, where you can monitor the test progress in real-time.
Running Web Test #
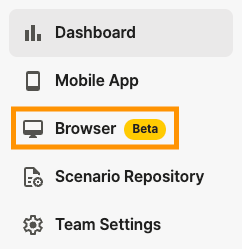
Step 1. To test the Browser, click the Browser button in the left menu bar.

Step 2. Either click the test execution button for the project to test, or enter the project and click the Run Test button in the upper right corner.

Step 3. Configure your Test Suite settings, test URL, browser settings, duration, location, test options, and Advanced Options (optional).
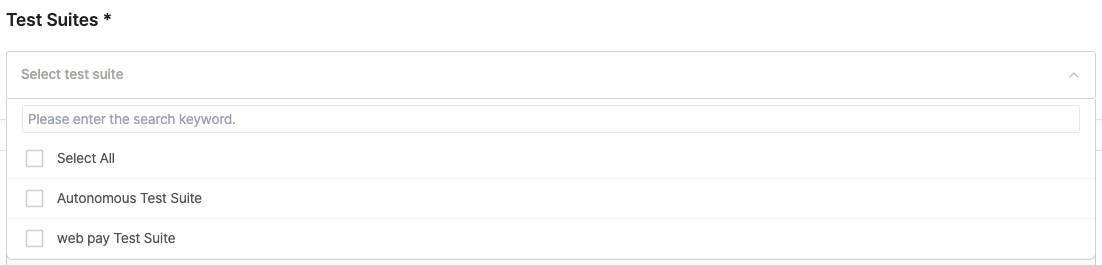
Step 3-1. Test Suite Settings
Click the Test Suite section to display a list of available Test Suites.
Select the Test Suite for testing.

Step 3-2. Test URL Settings
Enter the URL of the homepage for testing.
Example: https://apptest.ai
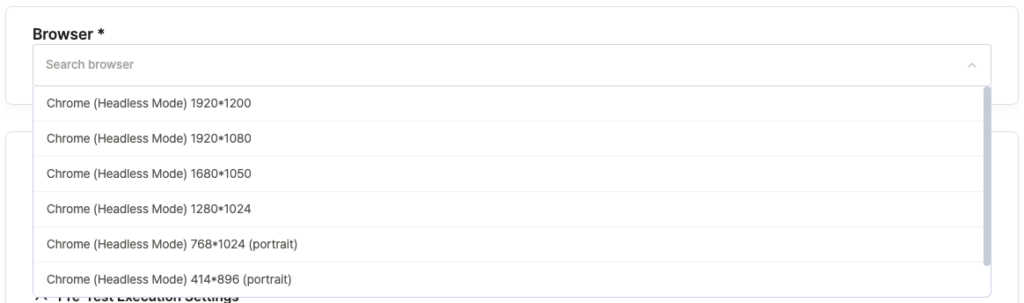
Step 3-3. Test Browser Settings
You can select the browser type and resolution for the test.
While the default resolution is set to 1920*1200 when starting the test, you can change it to a different resolution.
Step 3-4. Test Duration Settings
You can set the duration from a minimum of 5 minutes up to the maximum time allocated to your account, with a default setting of 15 minutes.

Step 3-5. Test Location Settings
You can set the country and region for testing.

Step 3-7. Test Execution Settings (Optional)
- Enable network capture for analysis: When enabled, collects network traffic as HAR (HTTP Archive) data for analysis.
- Enable lighthouse data for performance measuring: When enabled, collects Lighthouse data to measure performance metrics, including page load speed and user experience indicators.
Step 4. Run the Test
Once all settings are completed, click the Run button in the upper right corner of the page.
After clicking Run, you’ll be redirected to the project’s test list page where you can monitor your test progress in real-time.
Running Instant Test #
The Instant Test feature allows you to run tests immediately using just scenario files or app files without creating a Test Suite.
Tests executed through Run Instant Test will appear in the test list without a Suite name.
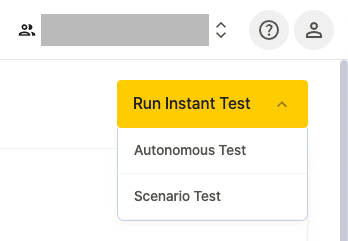
Step 1. To run an instant test, click the Run Instant Test button in the upper right corner.
Step 2. Click either Autonomous Test or Scenario Test button to run the desired test.
Autonomous Test #
- Project: Select a project from the available project list in your team. When you change the project, Application and Test Settings will automatically update to that project’s default settings.
- Application: The type specified in the project is set. The application type selected in an Instant Test only applies to that specific test and does not change the project’s settings.
- Device: Choose either Random Device or select from specific devices available for the project’s OS.
- Test Settings: Configure test duration, device language, app file re-signing, and other test-specific options. These are automatically populated with the default settings of the project.
- Additional Data: Configure additional data required for testing, such as login credentials.
- Run: Once all settings are completed, click the Run button to start the test.
Scenario Test #
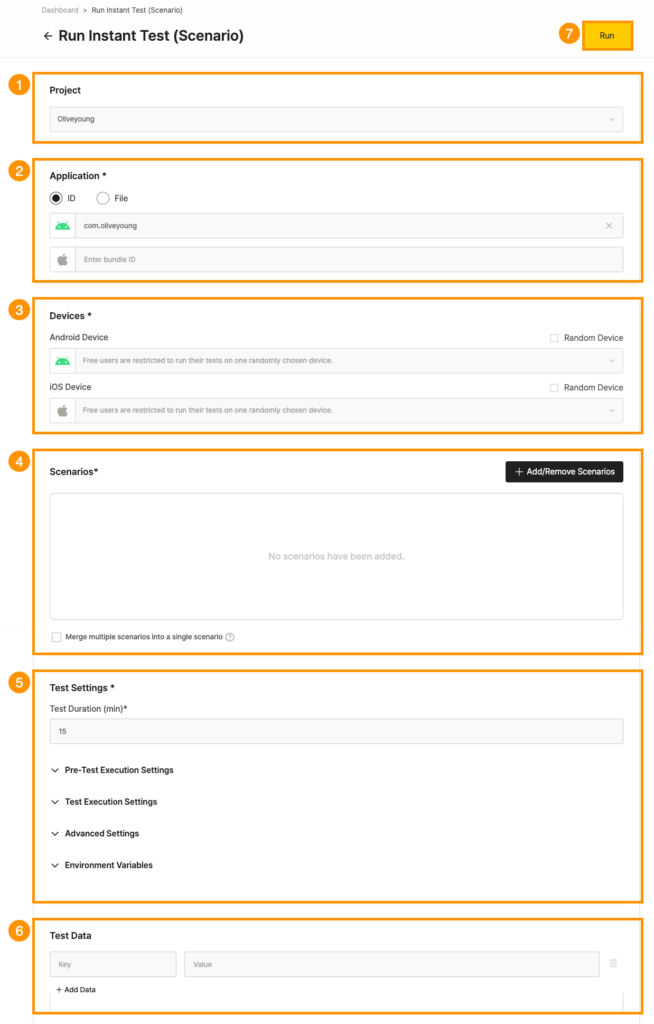
- Project: Select a project from the available project list in your team. When you change the project, Application and Test Settings will automatically update to that project’s default settings.
- Application: The application type set in the project is selected by default. Any changes made here only apply to this test run and won’t affect the project’s default settings.
- Device: Choose either Random Device or select from specific devices available for the project’s OS.
- Scenarios: Select the scenarios to use for scenario testing.
- Test Settings: Configure test duration, device language, app file re-signing, and other test-specific options. These are automatically populated with the default settings of the project.
- Test Data: Configure additional data required for testing, such as login credentials.
- Run: Once all settings are completed, click the Run button to start the test.