
In Ptero, a Test Suite is the primary unit for executing tests.
It stores the configuration—including scenarios, run modes, and test data—that is applied whenever a run is triggered.
Test Suite types #
The available test suite types depend on your project type.
| Project type | Available types |
|---|---|
| Mobile App | Autonomous Test Suite, Scenario Test Suite |
| D2D Mobile App | Scenario Test Suite only |
Test Suite list #
The Test Suites tab displays all Test Suites within your project.
| Column | Description |
|---|---|
| ID | The unique identifier for the test suite |
| Test Suite | The name of the test suite |
| # of Scenarios | The number of registered scenarios. Hover over the preview icon to see their names. |
| Test Type | Autonomous or Scenario |
| Run Mode | The execution method for the Test Suite |
| Created Date | The date the Test Suite was created |
Creating a Test Suite #
- Go to the Test Suites tab in your project.
- Click Create New Test Suite.
- Select the Test Suite type.
The new Test Suite will appear in the list.
Configuring a Scenario Test Suite #
Scenarios #
Click + Add Scenarios to select scenarios from the Scenario Repository.
To ensure Test Suites remain manageable and effective, we recommend organizing scenarios by feature or testing objective.
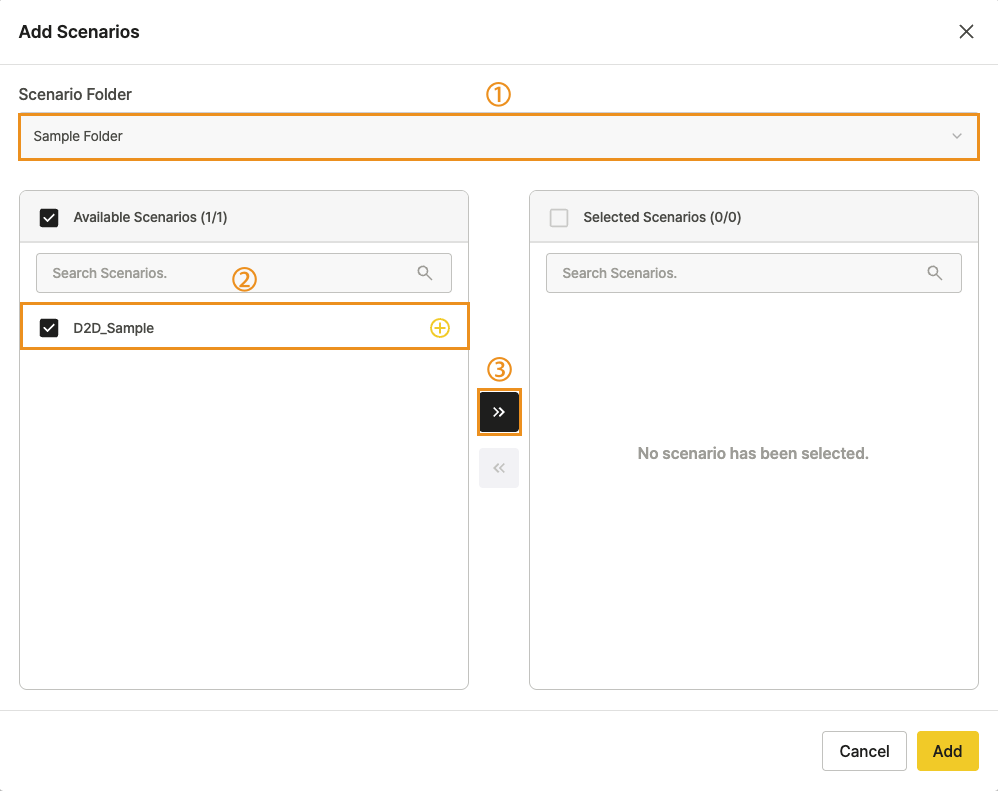
In the Add Scenarios popup:
- Select the folder containing your target scenarios.
- Check the boxes next to the scenarios you want to include.
- Click Add.
For more details, see Managing Scenario Repository.
Run mode #
Choose how the scenarios will run.
| Mode | What it does | Available in |
|---|---|---|
| Parallel | Runs scenarios simultaneously for faster execution. Ideal when tests are independent and do not share states or accounts. | Mobile App, D2D |
| Sequential | Runs scenarios one after another. Best for tests that require a specific execution order or share a login account. | Mobile App, D2D |
| Combined Sequential | Merges all scenarios into a single continuous flow and saves them as one consolidated result. | Mobile App only |
| Synchronized | Executes scenarios across multiple devices at the exact same time. Designed for real-time interaction tests, such as chat or voice calls. | D2D only |
Test data #
User Variables created in Stego are available when configuring a Ptero Test Suite.
Override these values when the same scenario must run with different input values.
To run the scenario repeatedly with multiple values, upload a CSV file and map each column to a User Variable.
Ptero runs the scenario sequentially with the values from the CSV file.
Input value priority #
If the same Key exists in multiple locations, Ptero applies values in this order at execution time.
| Priority | Location | When it applies |
|---|---|---|
| 1 | Data Set (CSV file) | Applies when Data-Driven Test is enabled and the CSV row contains the same Key. |
| 2 | Ptero User Variables | Applies when the Test Suite settings contain the same Key. |
| 3 | Stego User Variables | Applies as the scenario default when the same Key is not found in the Data Set or Ptero User Variables. |
For example, if the email Key exists in all three locations, the Data Set value is applied.
| Data Set | Ptero User Variables | Stego User Variables | Runtime value |
|---|---|---|---|
dataset@example.com | ptero@example.com | stego@example.com | dataset@example.com |
| – | ptero@example.com | stego@example.com | ptero@example.com |
| – | – | stego@example.com | stego@example.com |
User Variables #
Set up reusable key-value pairs that scenarios can reference during execution.
| Field | Description |
|---|---|
| Key | The variable name |
| Value | The value applied at runtime |
Data Set #
Upload a CSV file to manage large sets of User Variables simultaneously.

After uploading the dataset, preview the file to confirm all values loaded correctly.
Notes:
- Turning off the Data-Driven Test toggle disables the uploaded CSV data.
- If you turn the toggle back on, upload the CSV file again.
- Download an uploaded CSV file from Download CSV on the Edit Scenario Test Suite page.
- Uploaded CSV files cannot be edited. Upload a new file if changes are required.
- To verify how variables and Data Set values were applied in test results, see Reviewing Test Results.
Device Settings (D2D only) #
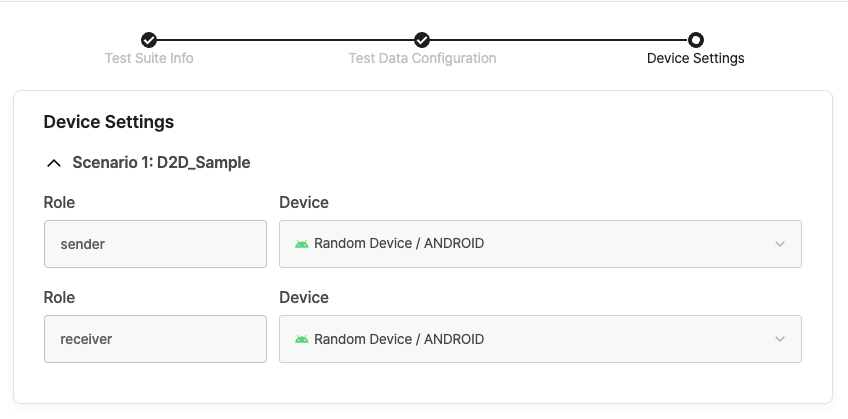
Specify the devices that will participate in the D2D run.
- Device Roles configured in Stego will automatically appear here.
- Each selected device displays its specific model and OS version (e.g., iPhone 12 / iOS 15.1).
Note:
Make sure to configure Device Roles in Stego before adding scenarios to a D2D Test Suite.
For guidance, see Scenario Settings.
Autonomous Test Suite (Mobile App only) #
An Autonomous Test Suite allows the AI to automatically navigate and explore the app without requiring predefined scenarios.
A default Autonomous Test Suite is automatically generated when you create a Mobile App project;
you can also create additional suites as needed.
Setting up an Autonomous Test Suite #
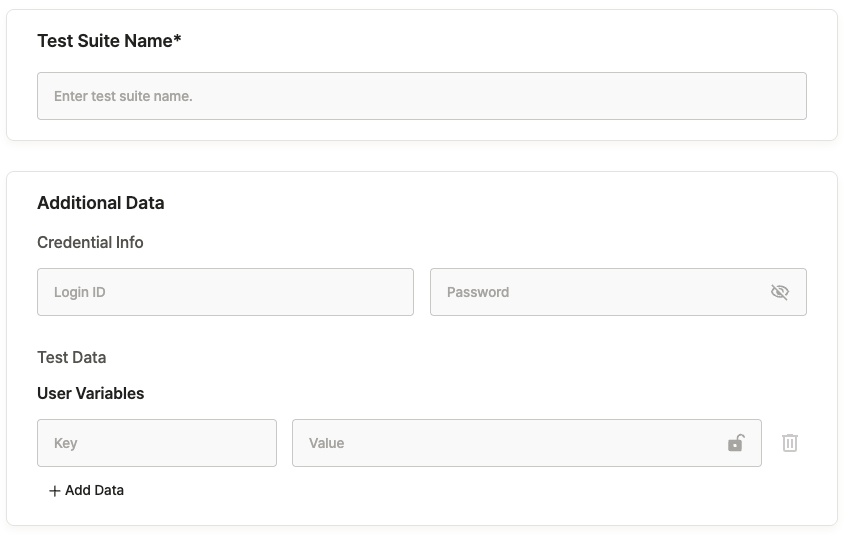
Test Suite Name: Enter a descriptive name for the Test Suite.
Credential Info: Define login credentials. The AI will automatically apply these when it encounters a login screen.
| Field | Description |
|---|---|
| Login ID | The account ID used during testing |
| Password | The corresponding password for the account |
User Variables: Provide key-value pairs that the AI can intuitively use during the app exploration phase.
| Field | Description |
|---|---|
| Key | The variable name |
| Value | The variable value |
Copying, editing, and deleting Test Suites #
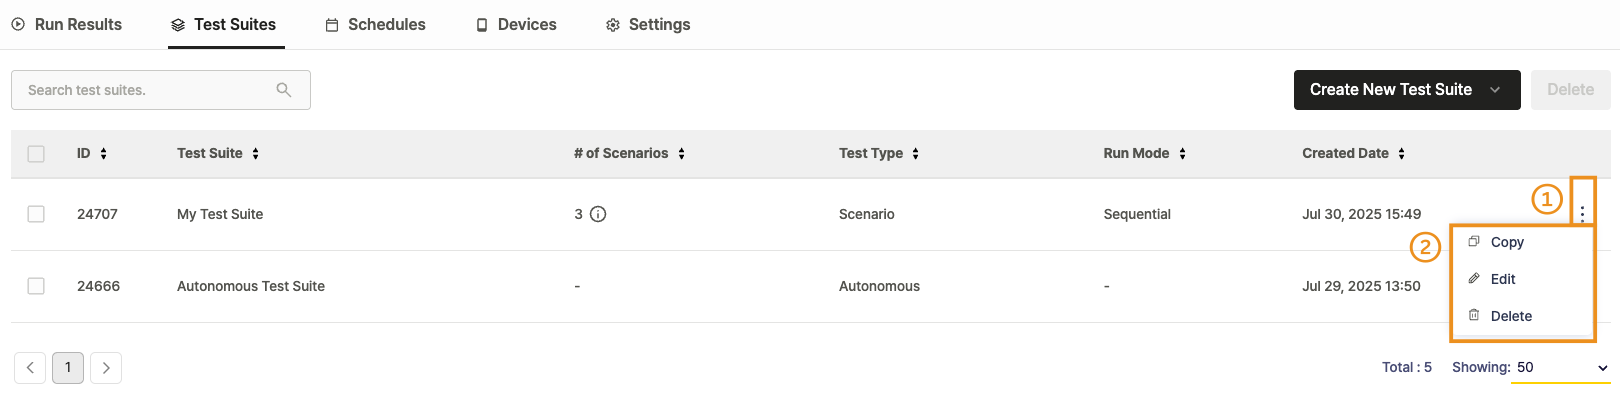
Click the ︙ (More Options) icon next to a Test Suite to view the following options:
- Copy:
Duplicates the Test Suite.
The duplicate is named automatically in the format[Original Name] Copy [Number](e.g., test → test Copy 1). - Edit: Opens the Test Suite configuration page to allow modifications.
- Delete: Permanently removes the Test Suite from the project.
Note:
Once deleted, a Test Suite cannot be restored.
Deleting multiple Test Suites at once #
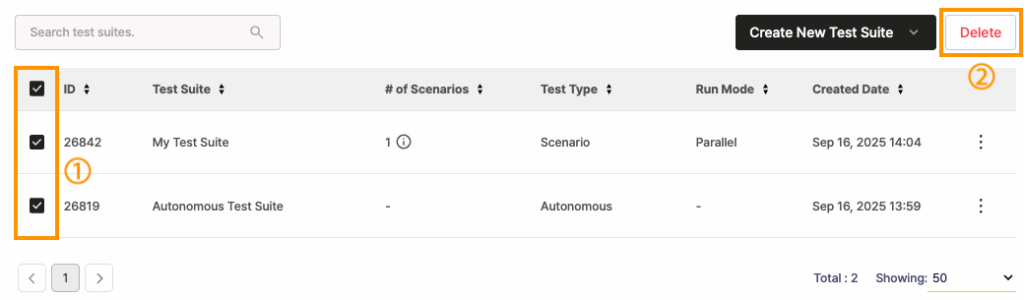
- Select the checkboxes next to the Test Suites you wish to remove.
- Click the Delete button in the upper-right corner.
Note:
Once deleted, Test Suites cannot be restored.