
A scenario consists of multiple steps. Each step automates a user action by combining an Action with a target UIObject.
- Action: Type of user action to execute (e.g.,
Touch,Swipe,Scroll). - UIObject: Target element on which the action is performed.
When a Local PC is connected as a Local Desktop, see Writing Scenarios on Local PC.
Create Steps #
Add steps in one of the following ways.
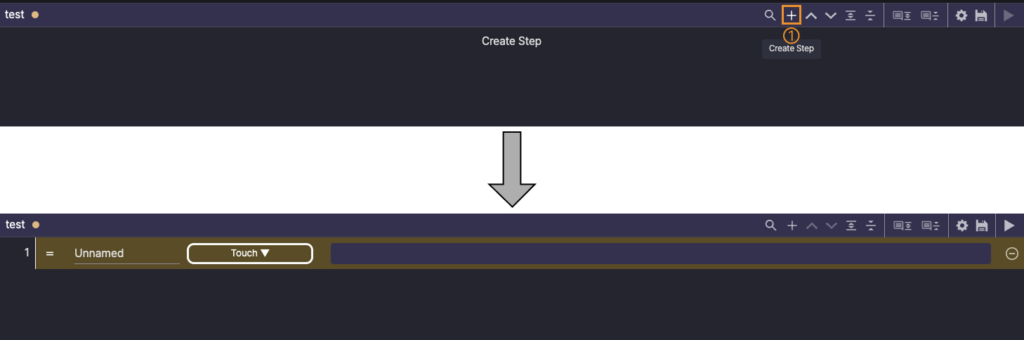
1. + button: Click + in the top-right corner of the Scenario Editor panel to add a step.
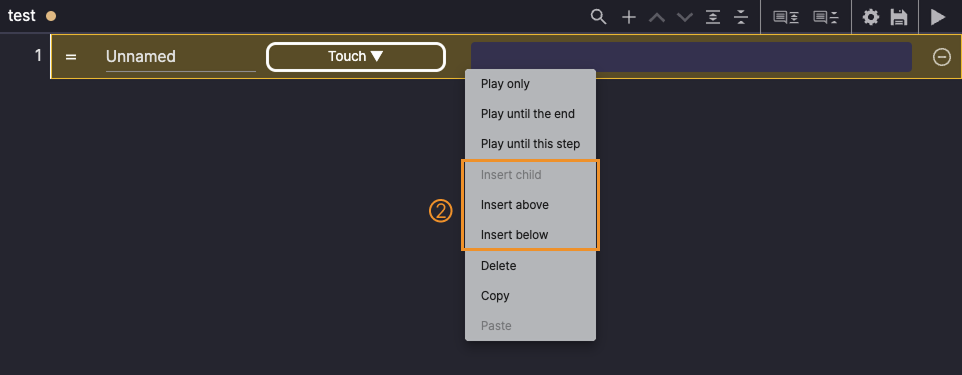
2. Use Insert: Right-click, then use Insert options to add steps at specific locations.
- Insert child: Add a step under the selected step for conditional execution.
- Insert above: Add a step above the selected step.
- Insert below: Add a step below the selected step.

3. Recording
When a device is connected, Stego automatically detects user actions performed on the mirrored device screen or from the Device tab,
and creates corresponding steps.

Change Steps #
Change Names #
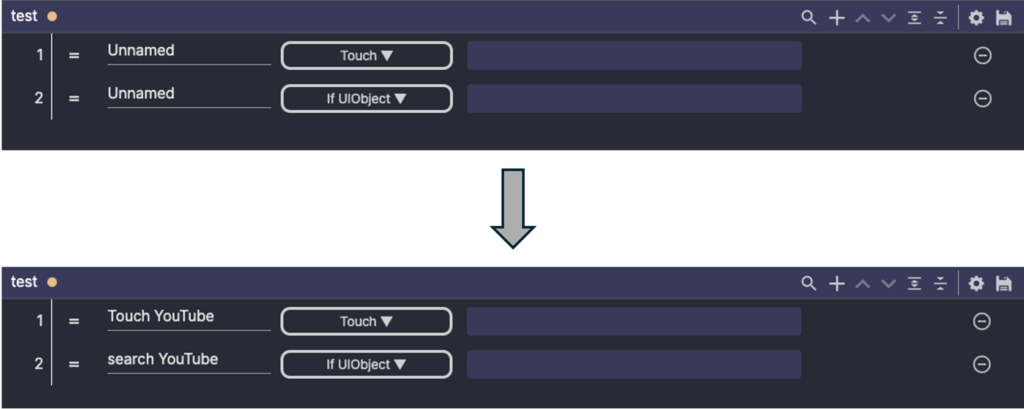
New steps are named Unnamed by default. Rename them for clarity.
Change Actions #
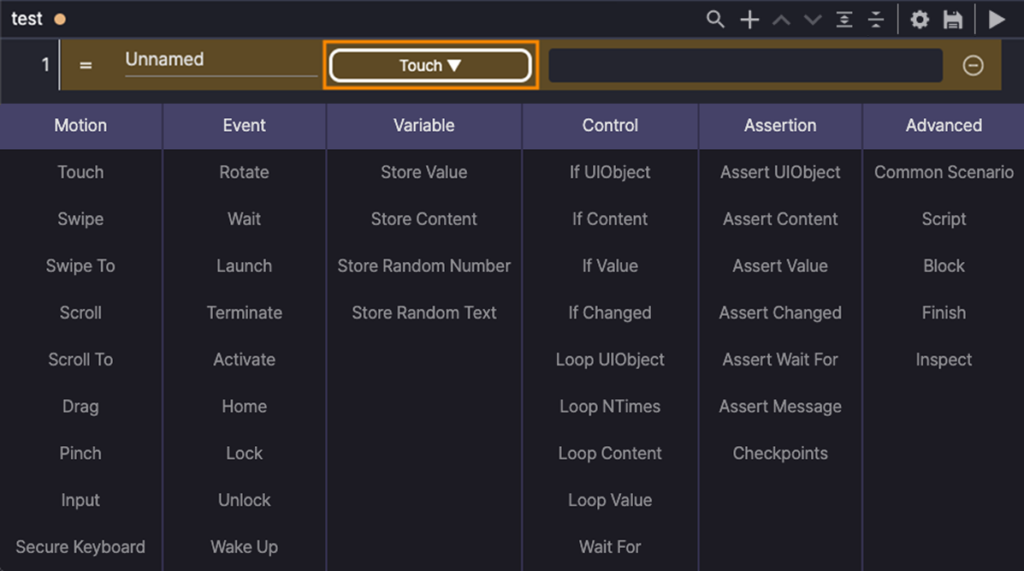
Click the action’s ▼ button, then select the action to run. For action-specific settings, see Actions Overview.
Set UIObjects #
Select the UIObject for the action. For UIObject setup, see Configuring UIObjects.
Change Step Order #
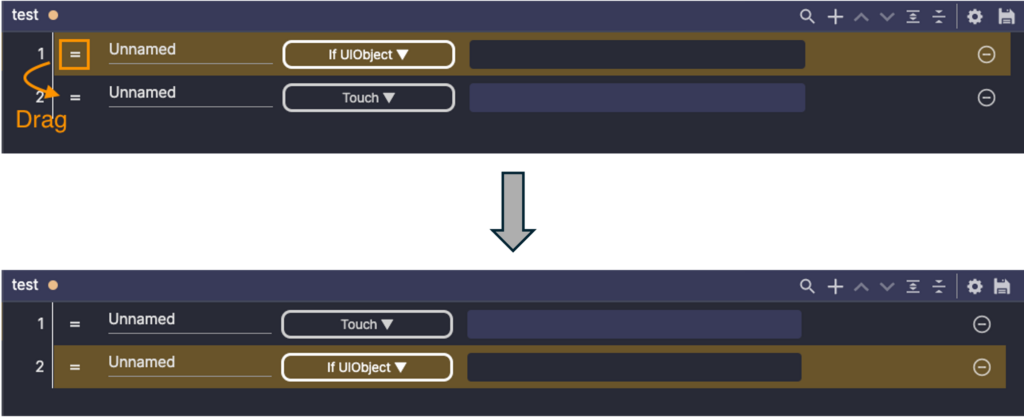
Click the drag icon -, then drag the step to the desired position. Drop to update the order.
Check the result #
- The added step appears in the Scenario Editor panel.
- The step name, Action, and UIObject match the intended test flow.
- If you changed the step order, the Scenario Editor panel shows the updated order.