
v1.30.0 (2026-11-20) #
1. New feature: Recovery scenarios #
Handle unexpected popups when a step fails, and clean up after a test.
Create the actions you need as a common scenario, then add it in the Recovery tab.
| Type | Description |
|---|---|
| Step Recovery | Handle an issue that prevents a step from running, then retry the failed step. For example, if a popup blocks the UIObject a step needs, Stego can run a Recovery scenario to close the popup before retrying the original step. Stego selects a Recovery scenario that can run on the current screen. |
| Test Recovery | Run cleanup tasks after a test ends. Set up a Recovery scenario for actions such as logging out or closing the app, and Stego runs it automatically when the test finishes. You can choose to run it after every test or only when the test fails. |
Set up Step Recovery #
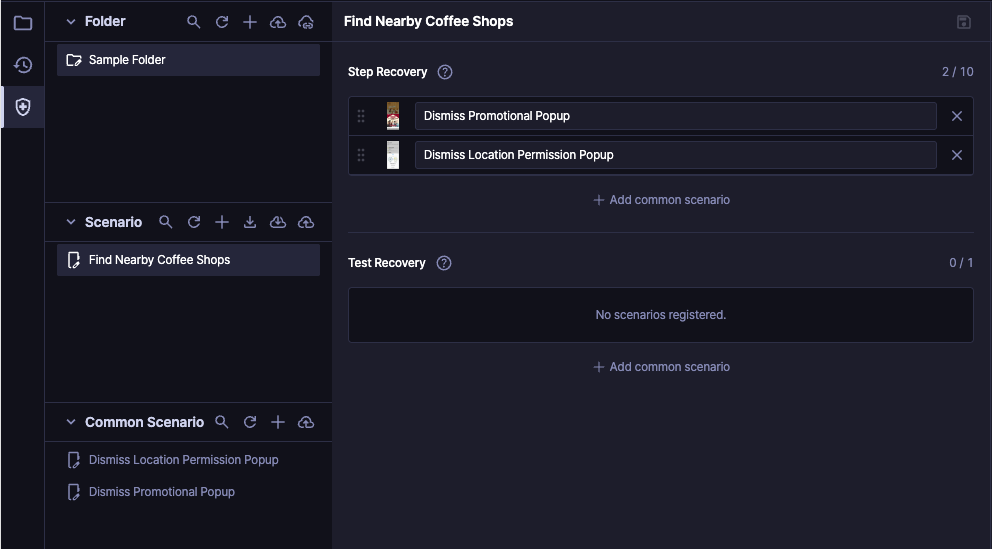
Open the Recovery tab on the left and select a scenario.
Under Step Recovery, select Add common scenario, choose the common scenario you want to use, and save.
When a step fails, Stego looks for a Recovery scenario that can run on the current screen.
It checks for the UIObject used by the first step to run in each Recovery scenario.
- Stego checks the list from top to bottom and runs the first matching Recovery scenario. Drag entries to change their order. If none match, no Recovery scenario runs.
- You can add a common scenario only if its first step to run uses a UIObject. Stego uses this UIObject to check the current screen. Scenarios that do not meet this requirement are unavailable in the list.
- You can add up to 10 Step Recovery scenarios.
Apply Step Recovery to a folder #
Handle the same popup across all scenarios in a folder.
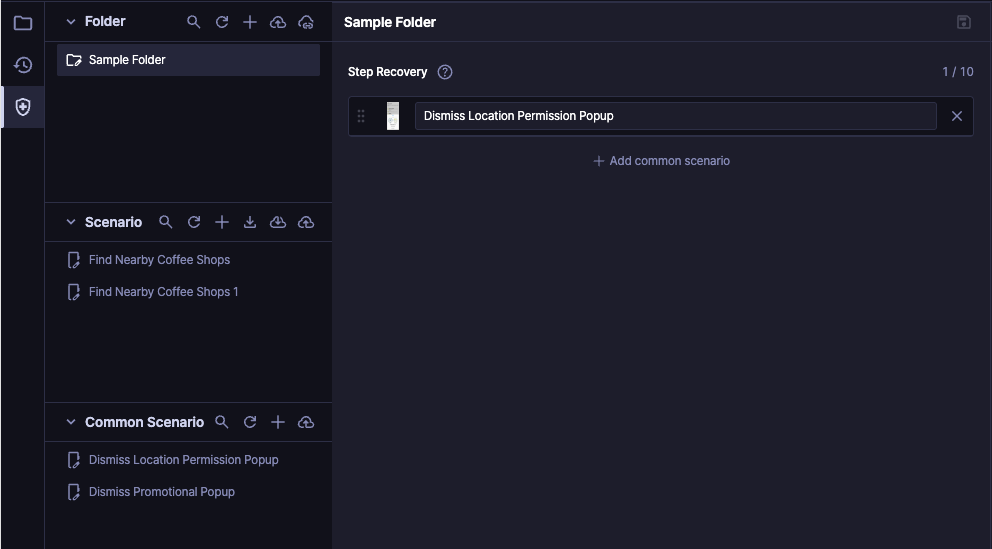
Select the folder in the Recovery tab, add the Step Recovery scenarios, and save. You only need to set them up once.
- Stego checks a scenario’s own Step Recovery entries first, followed by those added to its folder.
- Folder entries appear in a separate group below the scenario’s own entries. Select the folder to change them.
- If adding a folder entry creates a duplicate or exceeds the limit, Stego lists the affected scenarios and explains why. Open those scenarios and adjust their settings, then save the folder settings.
Set up Test Recovery #
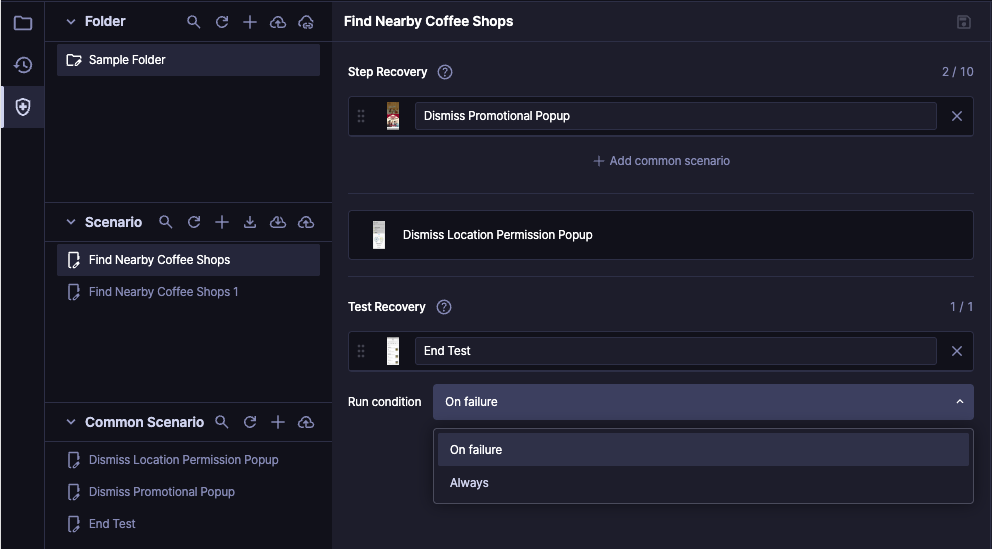
Select a scenario in the Recovery tab, then select Add common scenario under Test Recovery.
Choose a common scenario for tasks such as logging out or deleting test data. Set the run condition and save.
- Always: Run cleanup tasks after the test ends.
- On failure: Run cleanup tasks if the test fails.
- You can add one common scenario as Test Recovery for each scenario. Its first step does not need to use a UIObject.
You can view and edit a common scenario’s steps and attributes from the Recovery tab.
For a regular scenario, open Scenario Settings and select Recovery Scenario to view its Recovery settings in read-only mode.
You cannot change Recovery settings during a run or in read-only mode.
View Recovery results #
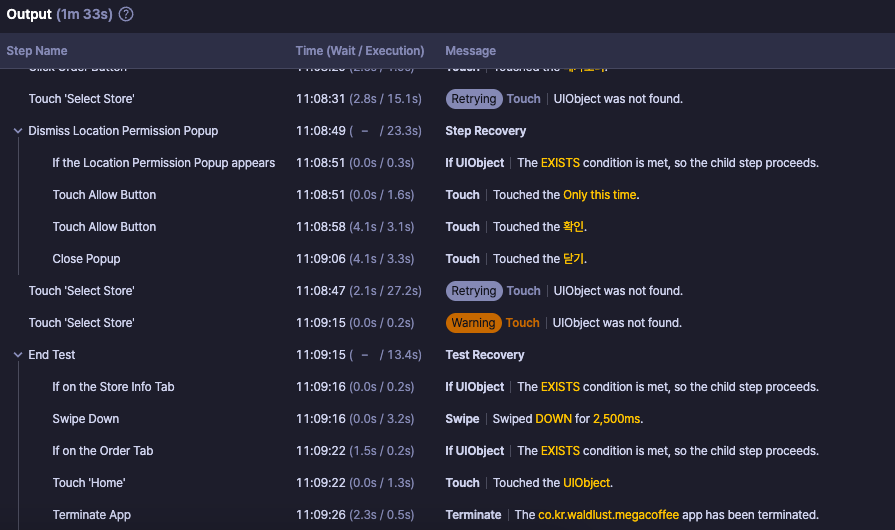
Review Step Recovery and Test Recovery runs in Output.
Select the arrow next to a Recovery scenario’s name to see the steps that ran.
- Select a result row to open Step Result and review the video and the steps that ran. If no video is available, you’ll see a screenshot instead.
- For Step Recovery, open the UIObject tab to review the match for the first step to run. This is the match Stego used to select the Recovery scenario.
2. Improved gesture display #
The Attributes panel and Step Result now share an updated gesture display that keeps buttons and text more visible.
Different start and end point colors and fewer unnecessary markers help you see where an action takes place and which way it moves.